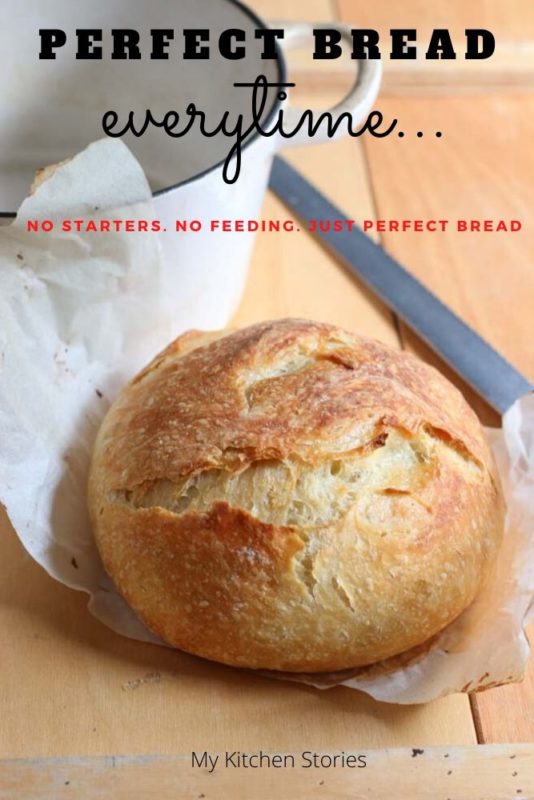
This is a recipe for bread the easy way. No starters. No kneading no failures. Perfect bread every time.
Perfect every time
Have you been an ISO baker? Have you given up on feeding starters and wondered why everyone on Instagram seems to have the perfect sourdough?
Then this is the bread for you.
You are not going to worry anymore about that heavy disappointing flat hard bread you waited 12 or 24 hours for, OK? Put it behind you. People spend a lifetime perfecting sourdough. We don’t have that time.
This bread has been popular on the internet for years so it’s not new but maybe you haven’t had the chance to try it before. Now is your chance.
This highly achievable AND simple recipe will amaze you. The hardest thing you will have to do is plan ahead.
This type of bread is more often known as no knead bread. I’ve given you a few similar recipes, like this. Try this Brioche bread. ( its also easy ). Or this No Knead Sweet Potato bread. They are perfect and will work to encourage you on your bread journey. This style of bread works by using a long fermentation. The moisture in the very wet dough helps build gluten without all of the work of kneading!
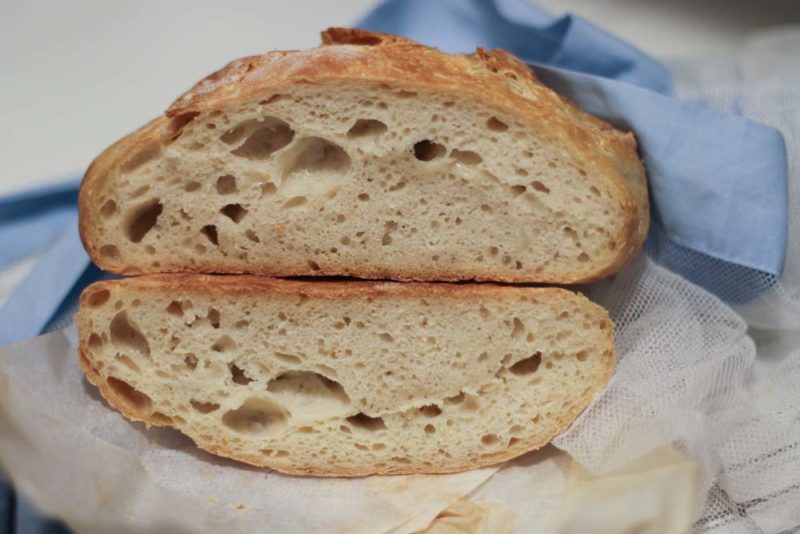
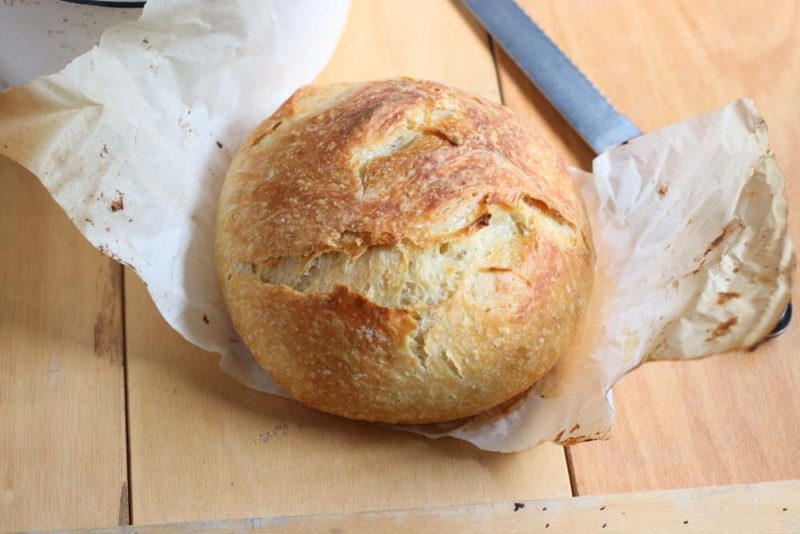
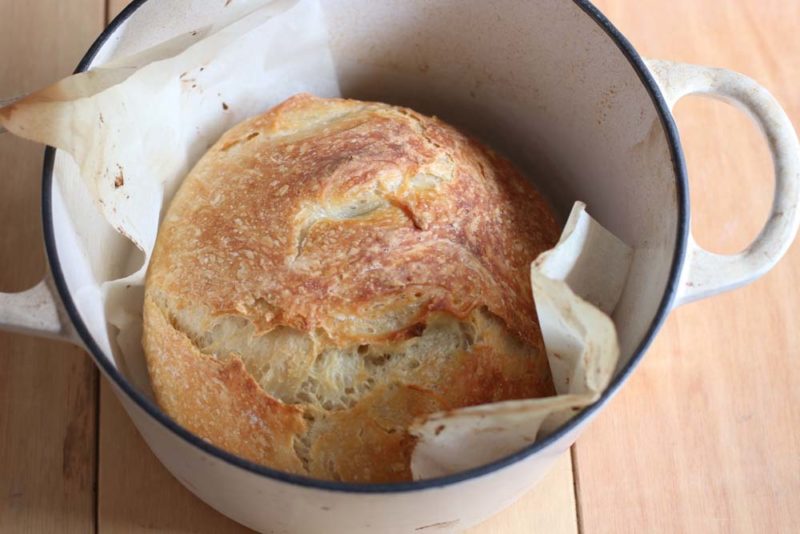
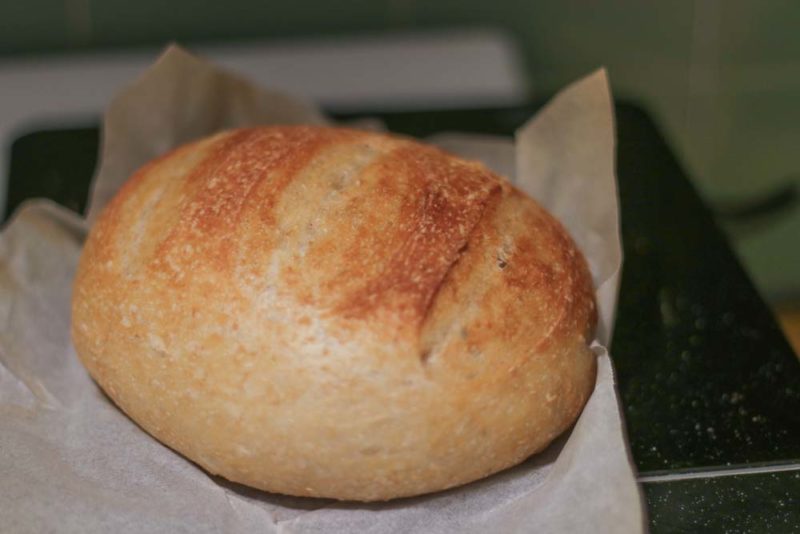
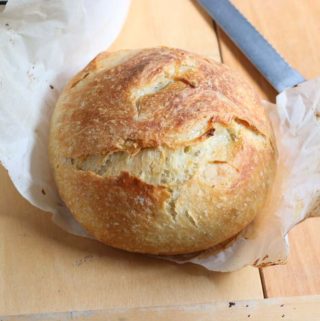
So here it is. The bread will have a thin crisp crust that shatters under your knife with a sourdough like interior.
What you will need to make bread
- You’ll need 4 basic ingredients. Four, salt, yeast, and water
- You will need to plan a day ahead (more about that later)
- Make the basic recipe before getting fancy
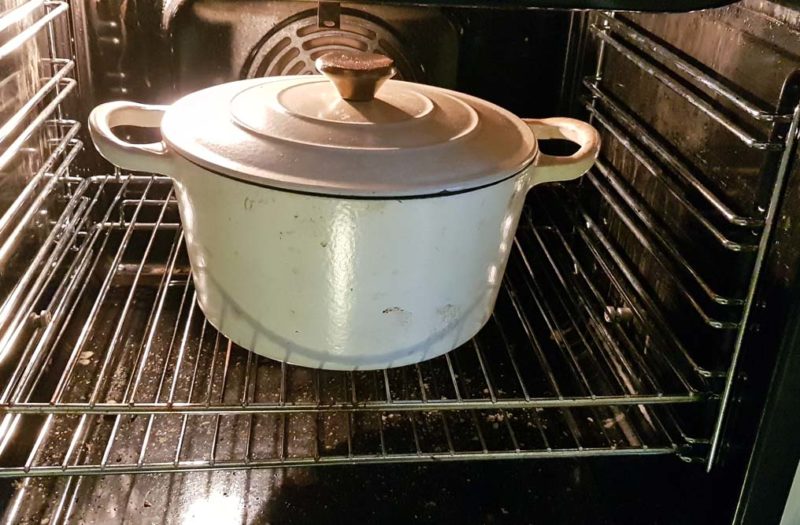
- You will need a Dutch Oven (like a le Creuset, le chasseur or Crofton). This creates the intense heat and moist atmosphere you need for this bread. This recipe was tested in an ovenproof pot with a lid. The results were positive but not as good as the Dutch oven.
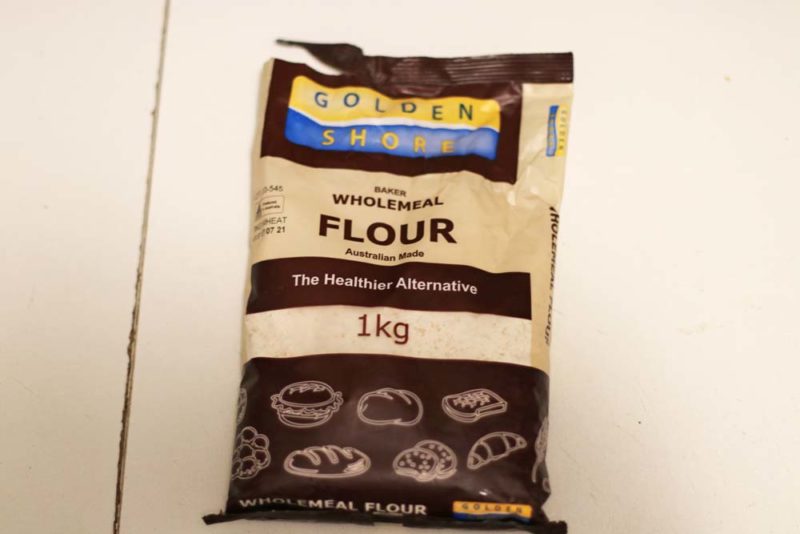
- Use baker’s flour. All-purpose flour is too soft. You can purchase specific flour from a market, supermarket, or bakery. It should say bread, pizza or baker’s flour.
How to make this bread and more
- Don’t knead the dough, just mix together. Once water hits flour the gluten starts to form. Strong gluten makes great bread.
- As the dough sits, the water gets into every flour grain. The official name for this is “autolyze”. You may have come across that term when making sourdough. What it means is that when you go back to your dough it will be very soft and sticky
- This bread does not require any mixing, kneading or knocking back. In fact the lazier you are the better your bread will be!
- If you don’t have scales, don’t worry. Use cup and spoon measurements
- Now the planning bit. Start this bread the day before you need it. If you want it today make another softer yeasted bread. This one needs 24 hours to perfect. If you want it for breakfast on Sunday morning, mix it up before heading out on Saturday. Eg. make it at 8 am before going shopping (it will take 10 minutes at most) On Sunday morning at 8 am, you will cook it for breakfast. Follow the step by step instructions!
- I bought my Dutch Oven for $24.95 at Aldi
- After you have made a loaf or two you can experiment. Wholewheat is a perfect choice. Or add olives herbs, dried tomatoes or seeds. I will include this in the notes below
Watch this video for helpful hints
Bread the easy way. No starter. No Kneading
Ingredients
- 450 gm Flour, bakers plain, bread or pizza flour, 3 cups
- 1 teaspoon yeast, active dried 7 gm
- 1 teaspoon salt (not flaked) 7 gm
- 375 ml water, warm 1 1/2 cups
- 1 Tablespoon olive oil ****optional
Instructions
- You will need a medium sized bowl. it can be stainless steel, glass or ceramic. Just as long as it is big enough to give the bread space to grow.I make the dough at the time I need it the next day. If you want it for breakfast or lunch make the base dough in the morning. If it is for dinner time then make it in the afternoon etc.You will also need baking paper and a Dutch Oven
- Put the flour, salt and yeast into the bowl and whisk together (or stir well)
- If you are using olive oil add it to the water then…..Add all the water at once and begin to stir with your hand (just one, the other one is holding the bowl). Mix from the outside collecting all the dry flour. You don't need to mix a lot it just needs to come together. There may still be bits and pieces around the bowl and it will not look smooth and mixed.
- Get rid of the excess from your fingers. Cover in plastic wrap well and put in a place where it will be undisturbed till tomorrow.
- Your dough will be a bubbly honeycomb mixture. Put some flour on the bench. Run your fingers around the top of the dough loosening the edges and then lift and fold the dough over itself a couple of times, then scrape the remainder out onto the floured bench, it will be very sticky. You DO NOT have to Knead it. Push it into a ball. Do this by using both hands to push the dough from the base inwards going around the base forming a circle. The dough will start to stretch and gather, pushing the dough towards yourself from the base works best. DONE (2-3 minutes)
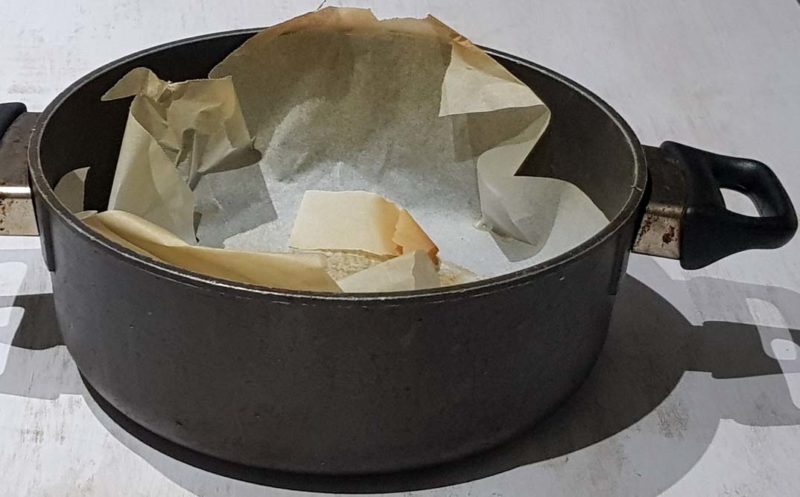
- Lightly oil or spray a piece of baking paper 30 x 30 cm (12×12 in). Put the dough ball onto the paper Lift the paper and put it into the Dutch oven. Cut the top of the dough with scissors. Cut very deep indets in around 3-4 places. This will allow the bread to expand. Put the lid on and set aside.
- Turn the oven and heat to 220C or 428 F. Leave for 10 minutes to heat and then put the baker into the oven. After about 20 minutes you will start to smell the bread baking. This is the time that it will rise so do not lift the lid before the first 30-35 minutes.***Caution when baking in a Dutch Oven. These are hot and heavy.
- The baking time will vary with different ovens. As a general rule after the first 30-35 minutes, you can take the lid off and let your bread brown. Final cooking time should be approximately another 15 minutes.If your oven is extra hot (that is your bread is browning very quickly) you can turn it down to around 190C / 374F and let the bread finish browning for another 15 minutes.
Notes

Can this be made in a bread oven?
Hi Pam
It is not designed for the bread maker as it is such a high hydration recipe.
I think you may find it too sticky
Best Regards Tania
Hi, I am about to make this recipe and I just made the dough and am going to leave it for the 24 hours. I don’t see in the recipe where it says where to leave it for the 24 hours. Does it need to be left in the fridge or at room temp on the counter?
Bench, outside the fridge
My dough has risen a lot within a few hours. Is it crucial to wait 24 hours before baking?
Sorry shay, I didn’t see this till a long time after you probably made it. It must be quite warm where you are. You can bake it before 24 hours if you feel it is ready