
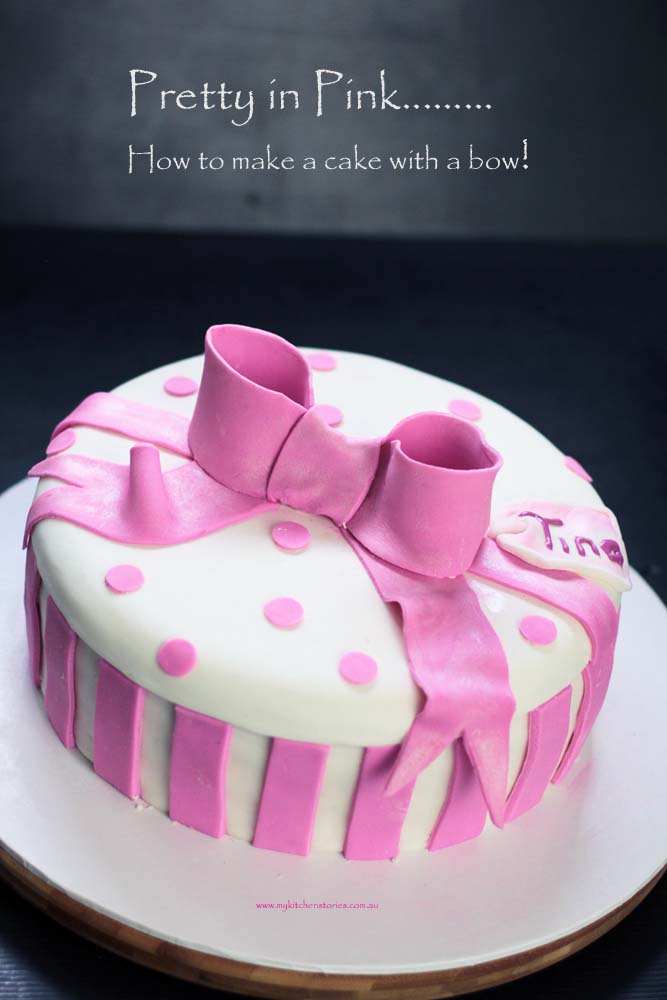
Well hello again from cake central. So it seems there is no end to the cakes that keep leaving this kitchen. That means you have to suffer through them too I am afraid!. I thought maybe you would like to see how a Bow Cake is put together.
Despite it’s appearance this cake is really quite simple. You could simplify it further and it would still be a stunner.
The cake beneath this icing is a vanilla cake with varied pink ombre layers. If you are not sure what that is it means the layer starts at vanilla and moves into ever pinker layers as it goes up. There are 4 layers altogether. I wish I could show you inside but the birthday girl forgot to take a photo. It’s always a nice surprise to have a multicoloured interior when you cut into it. If that isn’t something you really want to do then follow this straightforward chocolate cake recipe here.
I think the thing about this cake is keeping it as simple as possible on the outside at least. You could colour the main cake part pink and put a big white bow on top if you wanted to skip the stripes and dots.
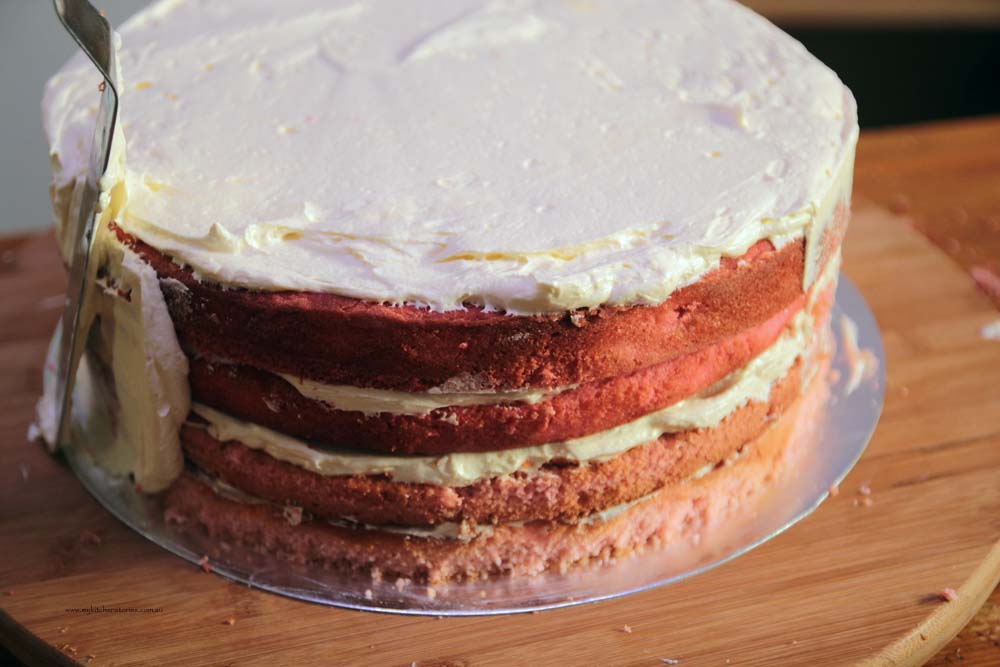
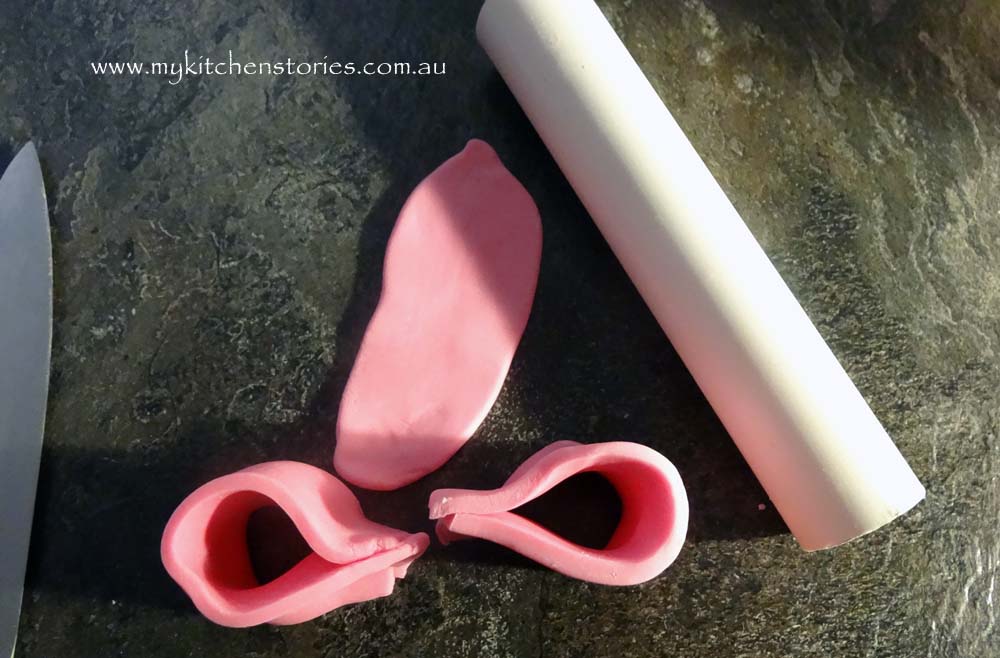
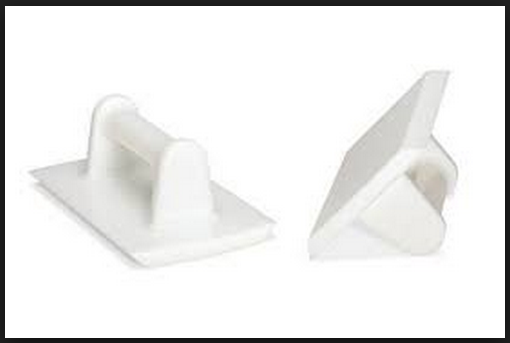
The start of this cake will be deciding if you are going to bake a layer cake or perhaps a chocolate cake. 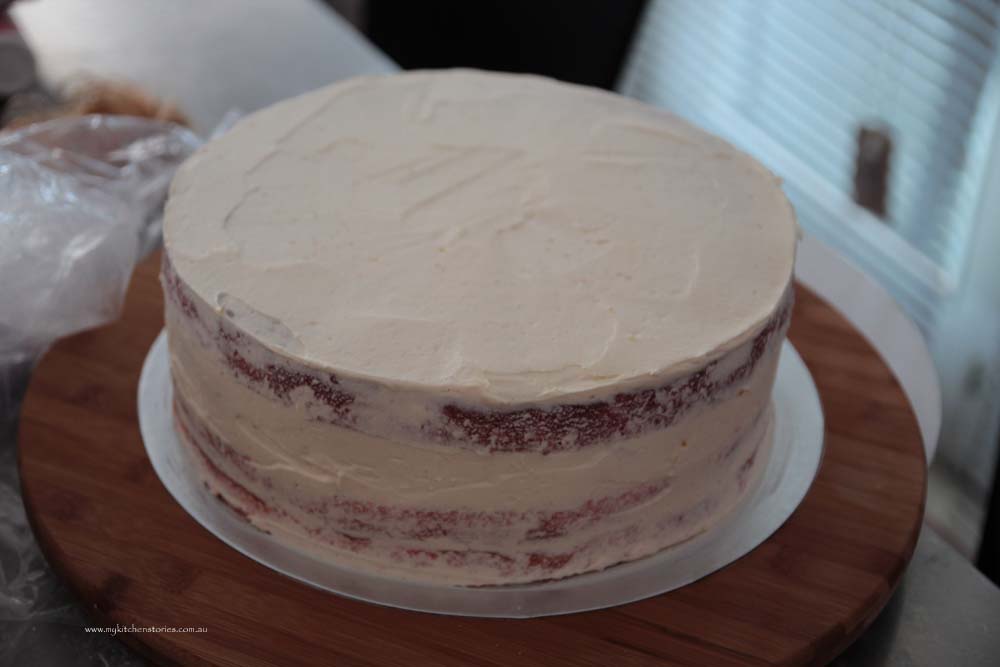 A crumb coat is the next step no matter which cake you bake and decorate. Cover the cake with a thin smooth layer of buttercream frosting then chill for 15-20 minutes. A nice pallet knife or piece of firm plastic will make spreading buttercream easier. ( picture below). Chill the cake till the buttercream is firm, before going on to covering with roll out icing. I use a wooden lazy susan type contraption to make spreading buttercream easier. You can also buy a proper cake turner from a decorators shop. ( Mine is from Victoria’s Basement-Sydney, around $25.00). While the cake is chilling I start to make the bow.


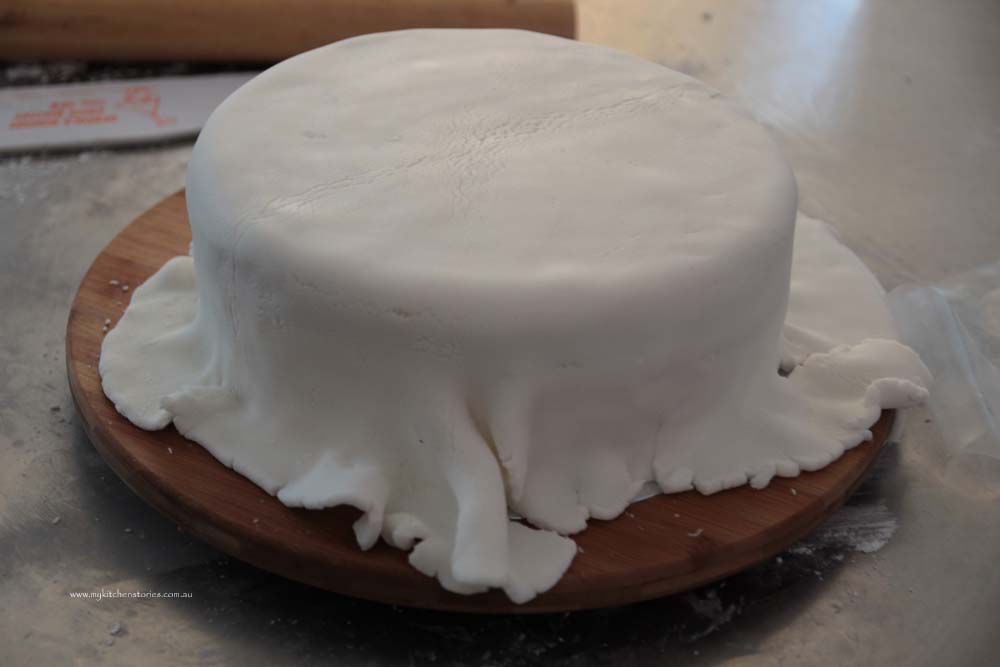
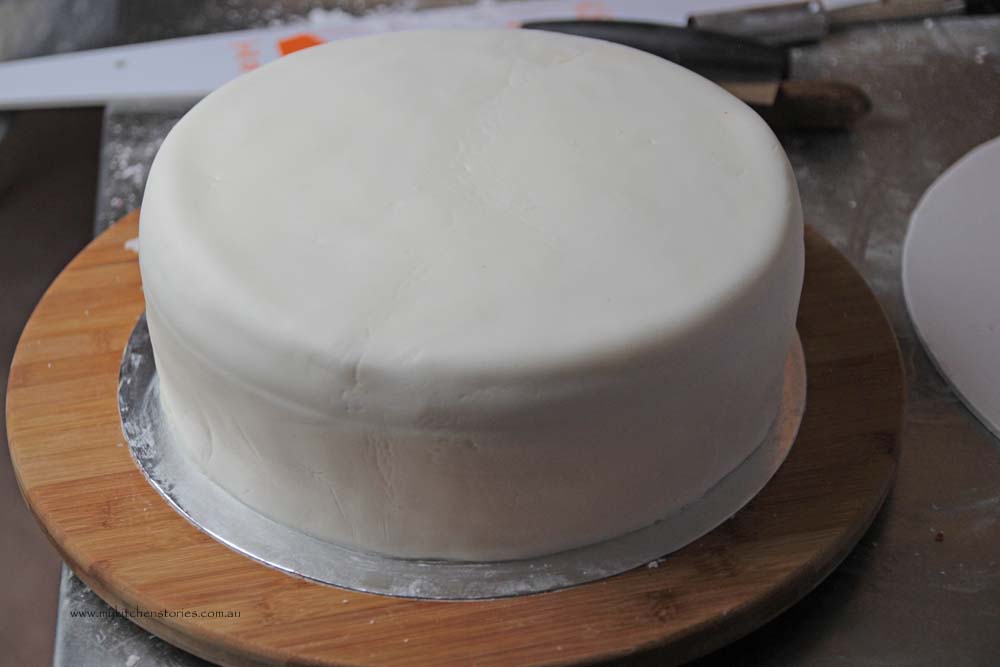
Once you have chilled the cake down, you can start to cover it with icing. It is probably easiest at this point for you to move the cake to a cake board. Choose whichever kind you like. It can be covered in paper, or a simple silver, gold or white board straight from the decorators shop. Whichever you use it needs to be very sturdy. I often decorate the cake board with roll out icing too!. Using a tape measure or a piece of paper, measure from one side of the cake to the other. This is the size of the icing circle you will need to roll out to cover the cake. I would use a whole 1 kg roll to start, just so I know there will be enough. Dust the table or bench with pure sifted icing sugar so that your icing doesn’t stick. Don’t roll too thinly. I also use a long flat spatula to run under the icing so that it doesn’t stick to the table. It’s just like rolling out pastry. Roll over your rolling pin and fold it up and over the cake. The icing will be easy to smooth out. Use a very fine piece of material ( like muslin) or a piece of thick smooth plastic or better still a proper cake smoother available at decorators shops. Cover, smooth and cut the plastic (fondant) icing a little bit longer than you think is necessary to cover your cake. Start to smooth down the icing. Once it is smooth and adhered to the cake begin to cut off some of the over hang. As you can see from the picture above there are sometimes bits that can’t be smoothed over, simply take a sharp paring knife and cut an upside down v shape taking out a piece of icing. Then smooth the two pieces back together . It’s kind of like doing a nip and tuck!
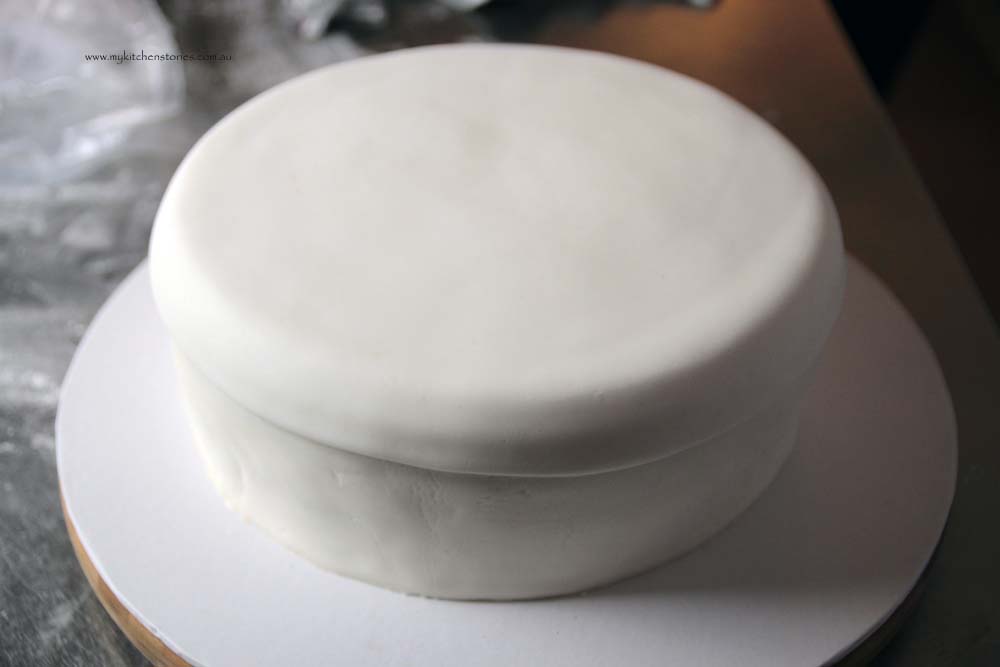
When you are happy with the base icing, you can go on. I have put a line around the top with a blunt end of a knife to mark where I want to put an extra piece of icing. I will add a circle piece that will look like a top for a box. Roll this out after measuring with a piece of paper or ruler how big you would like the top to be. I used a round cake board as a circle guide. Go ahead and roll it out. Before putting the top on, very lightly brush the sugar top with a bit of water to help the two pieces to stick. Just a very small amount.
After this I will start to decorate the box
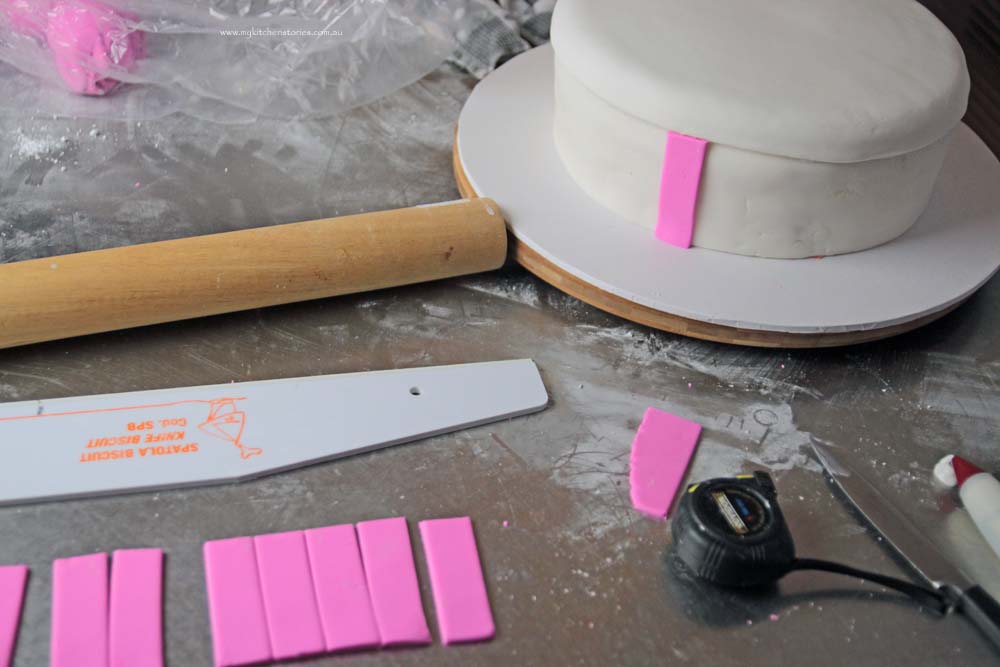 Measure and cut the stripes. Stick each of them on by moistening with a little water
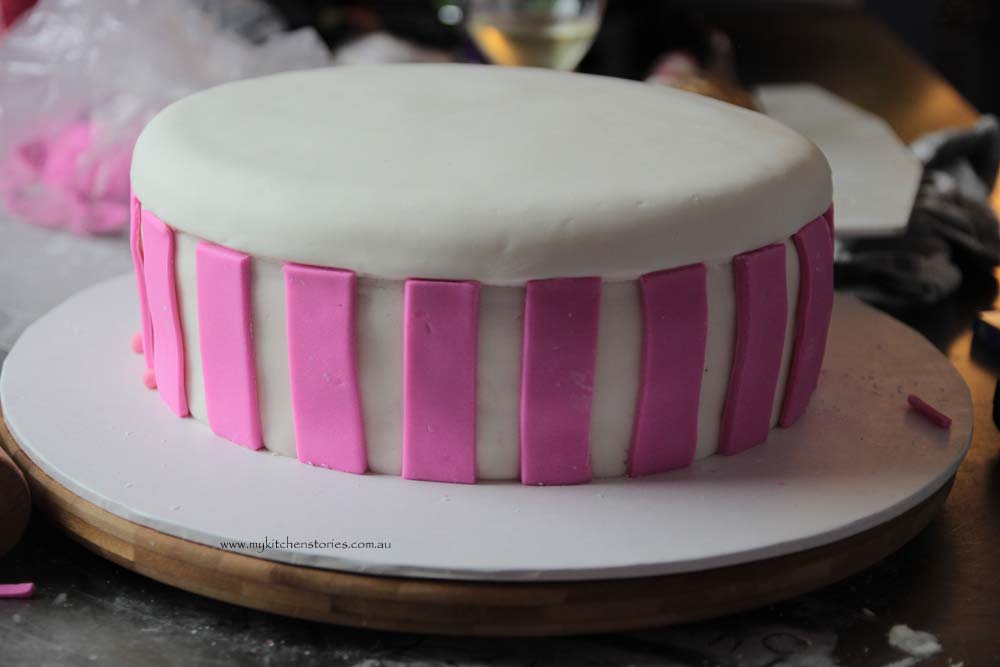
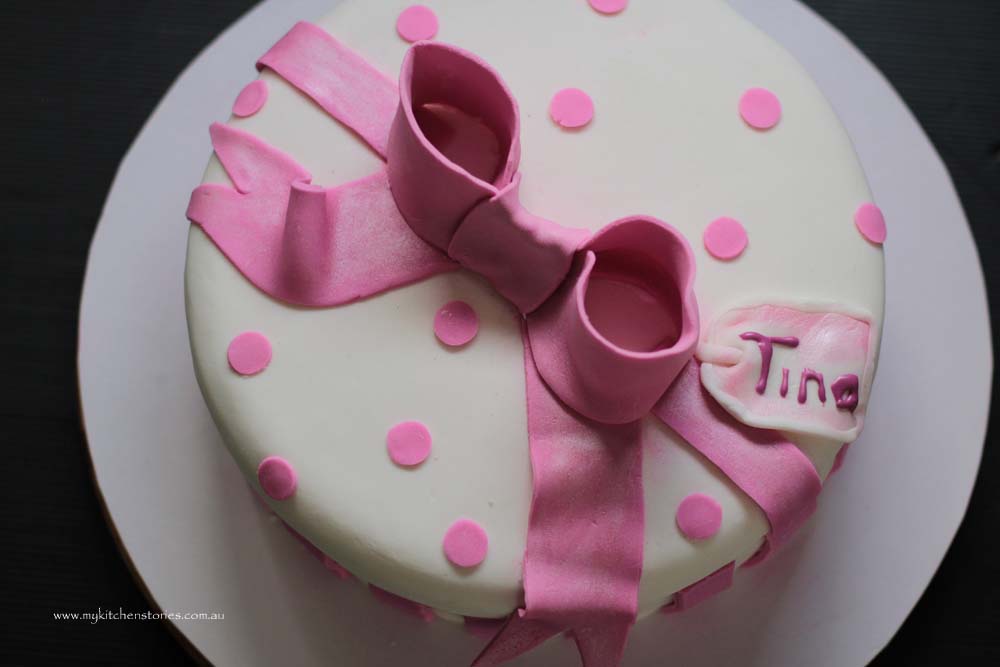
Add dots or any other decoration you want. I also made a name tag out of some of the left over icing. I have written on it with coloured egg white glue (see recipe)
Attach the bow and ribbon to the cake and then that’s it!
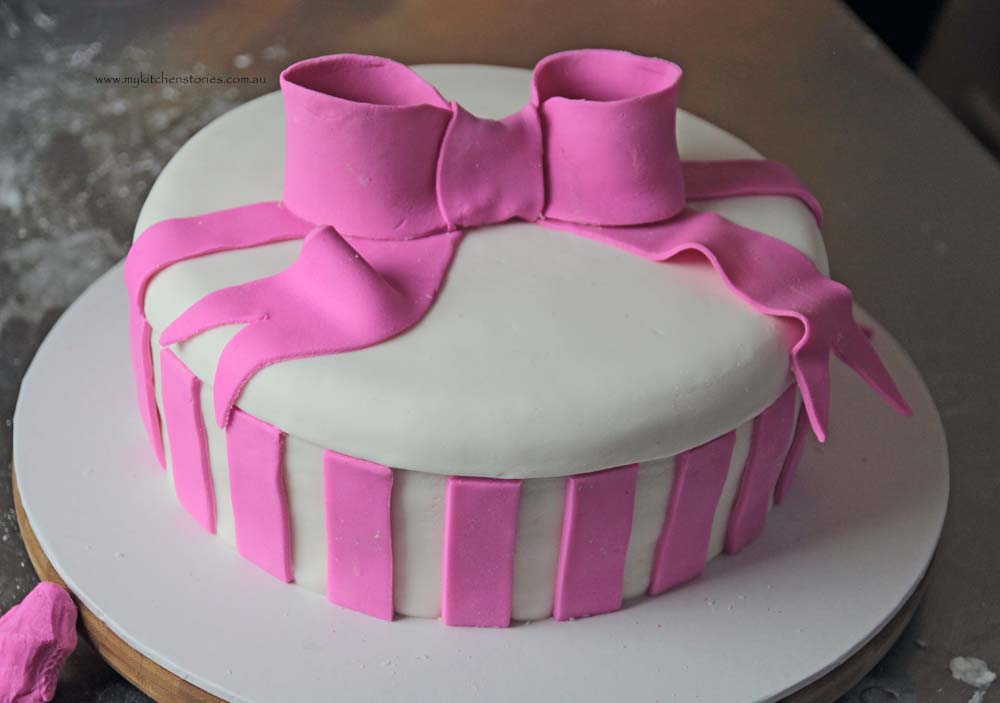
Here I have added the bow that I have attached by painting with the tiniest bit of water or egg white glue if you have it. I’ve dusted it with a little pink sparkle.
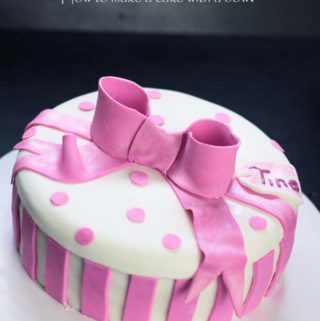
Pretty Ribbon Bow Cake
Ingredients
The White Layer Cake
- 450 gm plain flour 3 cups, cake flour is ideal
- 1/2 teaspoon salt
- 20 gm baking powder 1 tablespoon
- 250 gm unsalted butter 2 sticks
- 400 gm caster sugar / granulated 2 cups
- 250 ml milk room temperature
- 1 teaspoon vanilla extract
- 5 whole egg whites only 70 gm eggs
The White Chocolate buttercream
- 500 gm butter unsalted, Room Temperature
- 2 teaspoons vanilla extract or a vanilla bean scrapped
- 40 ml lemon Juice 2 tablespoon
- 480 gm icing /powdered sugar 4 cups
- 440 gm white chocolate chopped
- 1/2- 3/4 teaspoon salt
Icing
- 1 1/2 kg white sugar icing ( roll out plastic icing)
- 750 gm pink icing or another colour- or more white and colour yourself
- 1 pot food colour gel /s in what ever colours you like
- 1 pot brush on sparkle
Instructions
- Preheat the oven to: 165 C or 325 F. Have the tins greased and lined with paper
- You'll need a cake board, a cake smoother, small knives, a ruler and a rolling pin. The cake is baked in a 23 cm (10 in) cake tin with 2 x the recipe
- Sift the dry ingredients together
- Using an electric mixer and the paddle attachment beat the butter and sugar till light ( the mixture is quite sugary. Make sure you beat well, this will give you a light cake)
- Mix the vanilla and milk. Add ¼ of the milk to the butter and continue beating. Add ½ the flour and ½ the remaining milk beating till just combined. Add the remaining flour and milk.
- Pour into a large bowl and set aside.
- Beat the whites in a very clean bowl of the electric mixer ( or by hand) with the whisk attachment, till light or they hold nice soft peaks then fold the egg white through the cake batter
- If you want to colour the layers this is where it is done add a drop of colouring and mix gently. add more to get the colour you want. Always start with a small amount. Divide the mixture evenly into two cake pans and bake.
- Bake for approx 20 minutes or until the cakes are firm in the centre when touched lightly. You may need to wash the cake tin between layers. Leave the cakes to cool completely on racks. Refrigerate - or even freeze briefly for best results. The cakes will need to be trimmed a little to make them uniform and even.
Buttercream
- Melt the chocolate very gently in the microwave or over a double boiler and set aside to cool a little, as the hot chocolate will melt the butter making a sloppy buttercream
- Beat the butter till white and very airy light and creamy. Add 2 cups of sifted sugar and beat for several minutes. Add juice, salt , and start adding the white chocolate alternately with the the rest of the sugar and vanilla and beat till light and creamy. Taste, if it is light and delicious good but if it is a little lacking in flavour add a bit more salt and a bit more lemon juice.
- Set aside 1½-2 cups of icing for the outside. Evenly divide the same amount of icing between the 4 layers and sandwich together as you go. The buttercream doesn't need to be thick, just a small amount on each layer. Now, finish the cake with a thin layer of buttercream, smoothing all over evenly and without bumps, and refrigerate to set firm.
Decorating
- Measure the cake with a tape measure or a piece of baking paper from one side to the other so that you know how big to roll out your icing. Knead the roll till smooth then roll out evenly using a bit of pure icing sugar to stop it sticking to the bench. Use a flat pallet knife to run under the icing to stop it sticking. ( if you want a coloured box then colour the icing now too.
- Roll the icing over a rolling pin and onto the cake smoothing down with a cake smoother or a soft piece of muslin or a teatowl. This prevents lots of finger marks. Set aside.
- Gather all of the left over bits of icing making sure there are no crumbs or bits of colour in it. Knead again and measure the top of the cake so that a lid for the box can be rolled out to the right size. Roll a lid in the same way. lightly paint the top of the cake with a tiny bit of water and then put the lid on and smooth down.
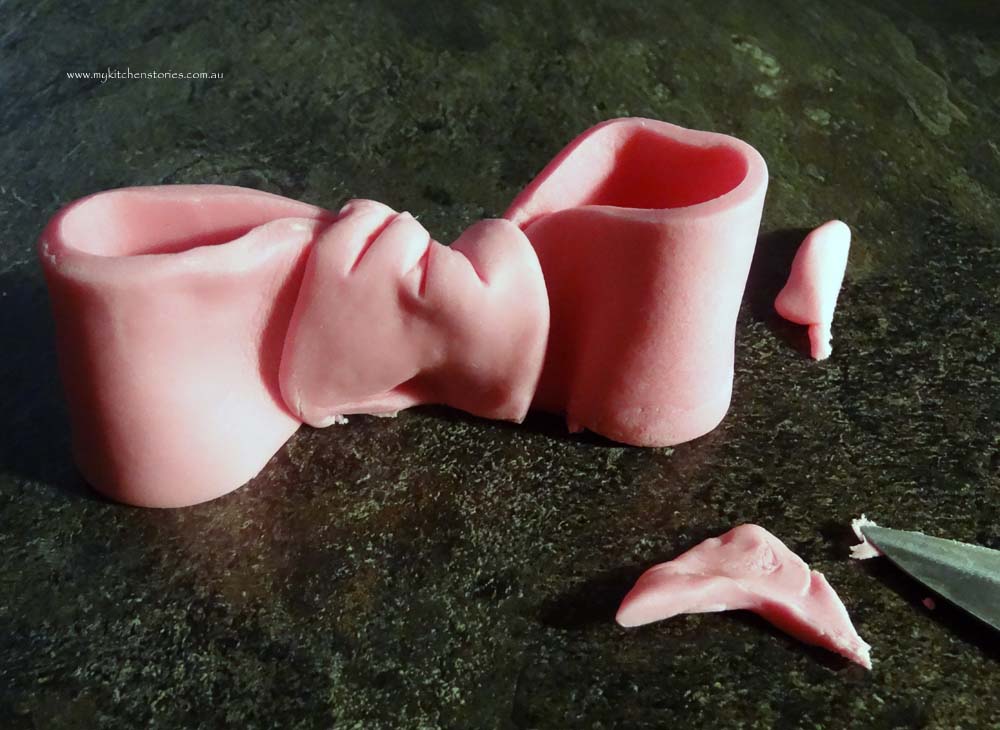
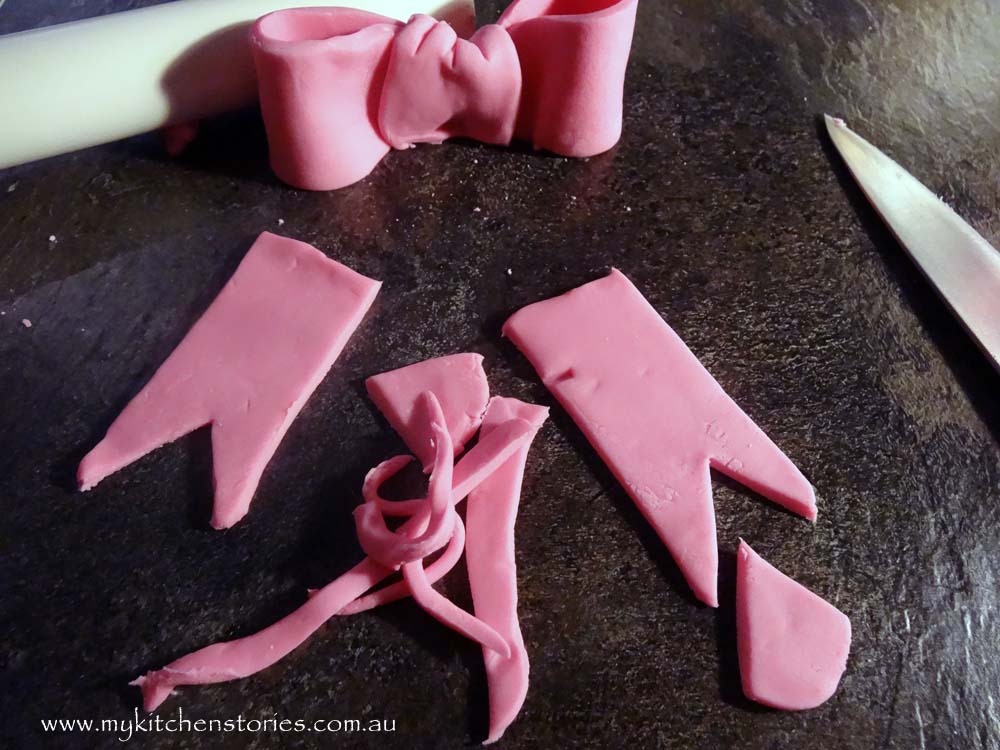
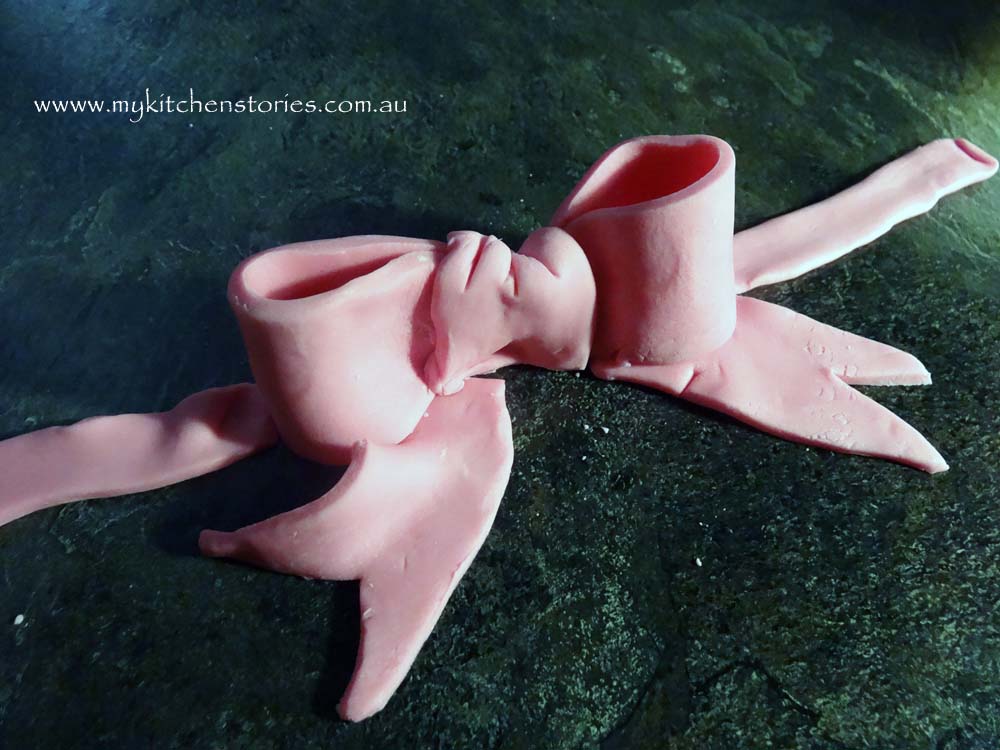
- Now for the bow. Use pre- coloured icing or make your own colour up by adding a bit of colour at a time and kneading till you have the colour you want . ( you'll need about 500gm) Make two large loops ( see pictures). Next make two even sized bow ends and a nice flat piece to go over the top of the loops to form the bow ( see pictures). Now all you need a two thin long strips to form the ribbon that makes it look like it is tied around the box. Measure the cake sides for the length you want, roll the pieces out in two long strips using a rolling pin and then using a ruler cut two even sized lengths about the width of half a ruler
- Stick the bow and the ribbon strips onto the cake.
- Now you can decorate using the leftover icing. Add spots or strips or just leave it plain if you like
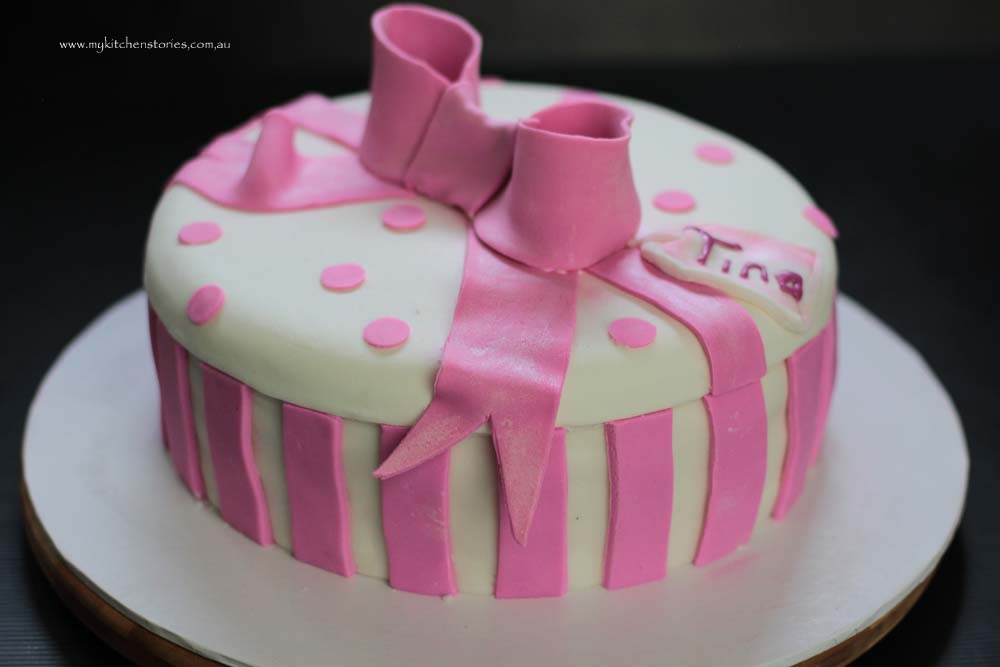
Here is another Pretty Ribbon Bow cake in a smaller size and colour.
More cakes? Look here.


To make the smaller size Bow cake you will need just 1 mix of cake. A 2 x 20cm or 8 inch tins. Then divide the mixture between the tins. The cake can be divided into 1/2’s once cooked if you prefer 4 layers. Make 1/2 recipe of white chocolate buttercream. You will only need 1/2 the amount of roll out icing. So approximately 1.750 kgm or 3.85 lb.
I have had some trouble with the icing I have been using lately it is very soft and hard to get smooth, so if you see some glaring errors then don’t judge too harshly.
Tell me …have you ever made a cake like this?
Pop back soon to find out who won those amazing SuperFood Kitchen Cookbooks and see what other exciting stuff is coming up soon!
This cake is the cutest, absolutely perfect 😀
Preferred to non-edible presents 😛
Cheers
Choc Chip Uru
What a beautiful cake and it looks perfect. I love it when I create something that turns out beautiful. It makes it worth all the effort, doesn’t it?
I’ve never worked with fondant icing before, jut I think I need to give it a try.
I know where I’ll be starting wen I decide it time, just loving this bow cake of yours Tania, beautiful work.
Thanks for joining in the Fabulous Foodie Friday Fun!
Have a great weekend xx
You really have your cake making mojo happening. Such a pretty cake, what girl wouldn’t love it.
PROPS on this cake decoration!! I do not have the skill or patience to master such an art, that’s for sure!
You are so clever with cakes. 🙂 I’m always in awe of the amazing things you make. 🙂
Thanks Krista. Thats a lovely thing to say
So pretty, Tania – congratulations on such a beautiful masterpiece.
I’ve never made a cake like this before. My one and only skateboard cake was the first and only rolled fondanty icing. It took me an entire day and once the photos were done, Rob ate nearly all the cake while I went out. 🙂
Maybe I should make him another cake.
LOL!
You can never have too many cakes! This is beautiful – I love the step by step for the bow