
Chocolate Mousse Tart light fluffy and irresistible. I’m sharing my favourite tart recipe with you. I love it so much, and so will you. Don’t tell anyone about it though it’s our secret.
So as I promised you here, this is the Chocolate Mousse Tart recipe I was talking about during our session of sweet pastry making.
I’ve been making it for years and I can promise you it’s better than any Chocolate tart you have EVA made. That’s because it is light and airy and so very chocolate mousse like.
So what’s the trick?. That’s an easy question. The beating of the egg and sugar till fluffy and light and the folding in of the chocolate. It’s like making chocolate mousse. And that’s just what it is!
Next, make it with gorgeous dark chocolate. Chocolate. (don’t make me have the couverture chocolate talk with you….. now, I’ll shut up). Pretty much every supermarket has proper cocoa butter based chocolate these days. so get that. Make sure it is dark…like 70 % or nothing less that about 64% at least. The dark chocolate and the lovely fluffy interior make it feel a lot less sweet. Just like a chocolate mousse only cooked. This is the chocolate tart that stays in everyone’s memory.
You know you don’t even have to decorate it at all. It’s absolutely the best served just as it is. Just let it cool down. I always try to serve it the same day or if not I try not to refrigerate so the texture stays velvety and moussey. Hey but that’s me.
Now this thing I am going to tell you may just change the game for you, or at least give you another option. You can make this tart filling mixture and pour it into a shallow dish and cook it with out pastry at all. Or in fact you could also pour it into a baked crumb crust base. Gah, I know. Endless choices.
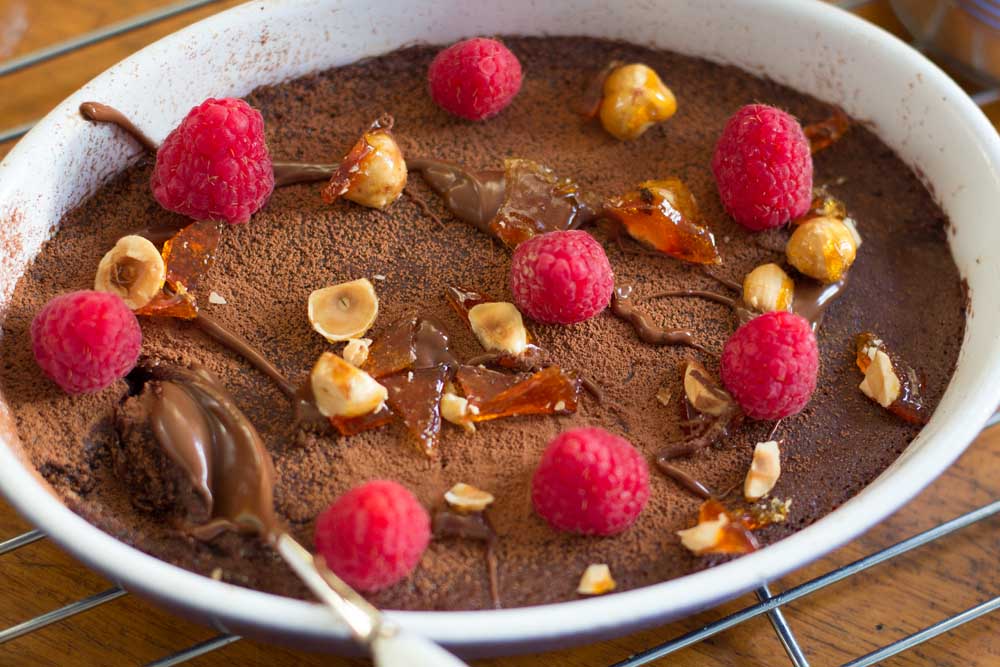
The baked chocolate filling with out crust. Do you call that crust-less tart?
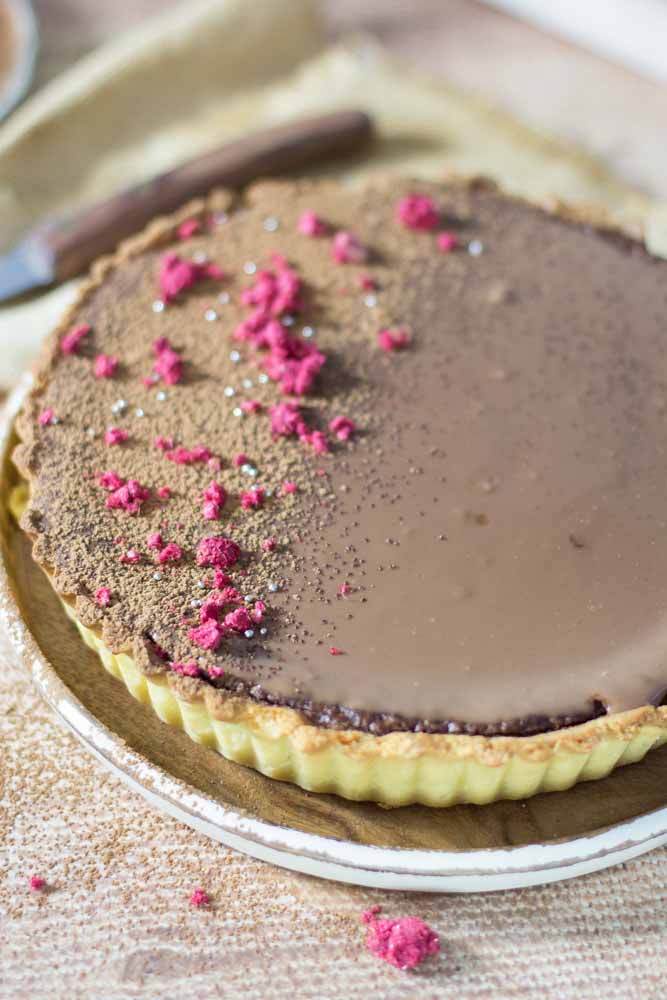
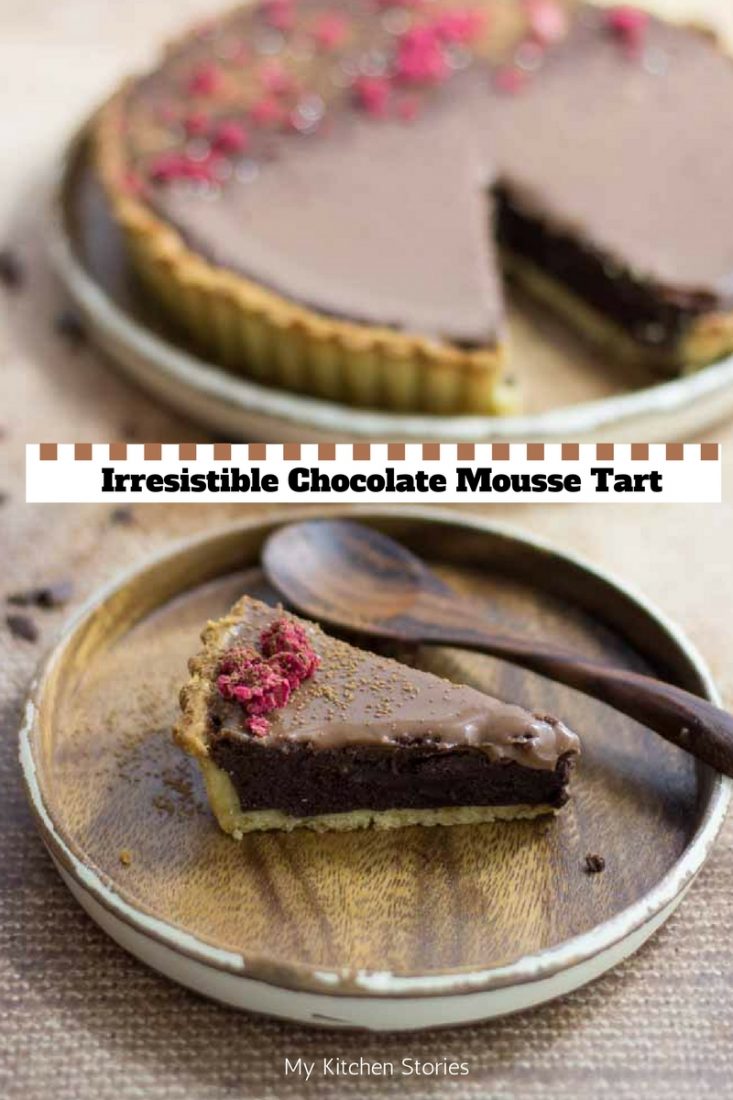
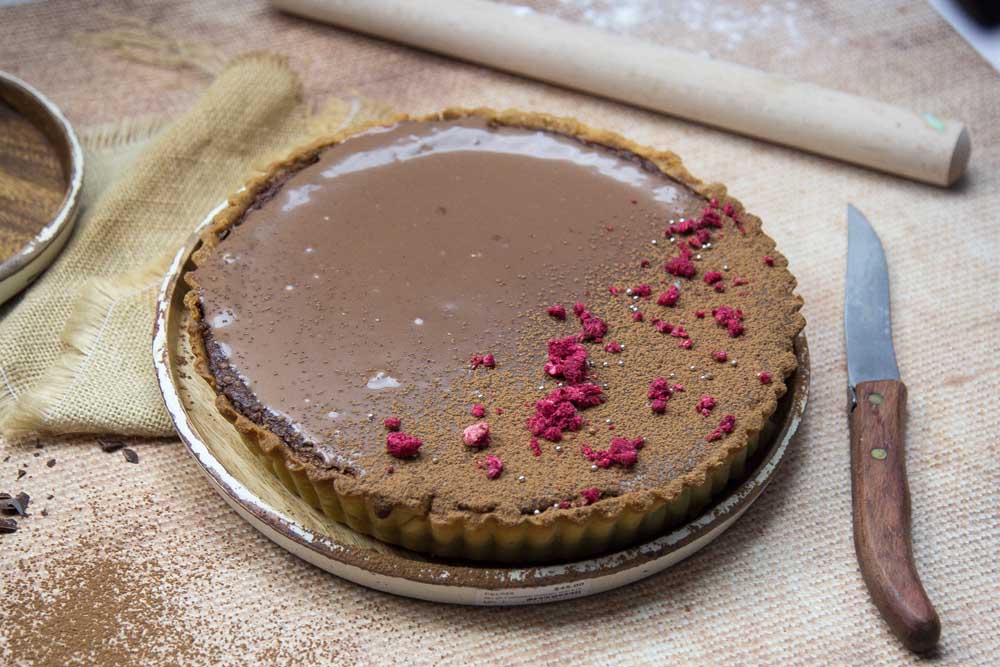
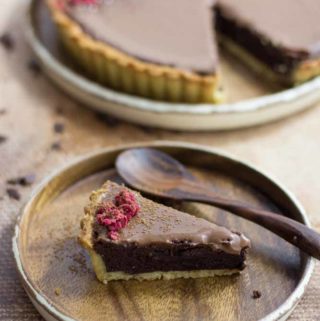
I’ve decorated the last one I made with a milk chocolate ganache and some freeze dried raspberries. I was making it for my next door neighbour and he is rather fond of milk chocolate. I usually give it a dark chocolate ganache coating if at all, cause I like that best. My obsession dark smokey chocolate.
But it just goes to show you anything goes……so do you want to give it a go. Please, let me know how you get on with your pastry skills.
Here a couple of hints and tips when making Chocolate Mousse tart.
-
- The better the chocolate the better the tart. Chocolate isn’t cheap );
- Beat the eggs and sugar till light and frothy. This gives the mousse it’s fluffy airy texture
- Don’t add the melted butter/ chocolate mixture to the eggs when it is too hot
- Fold the two mixtures together. Fold
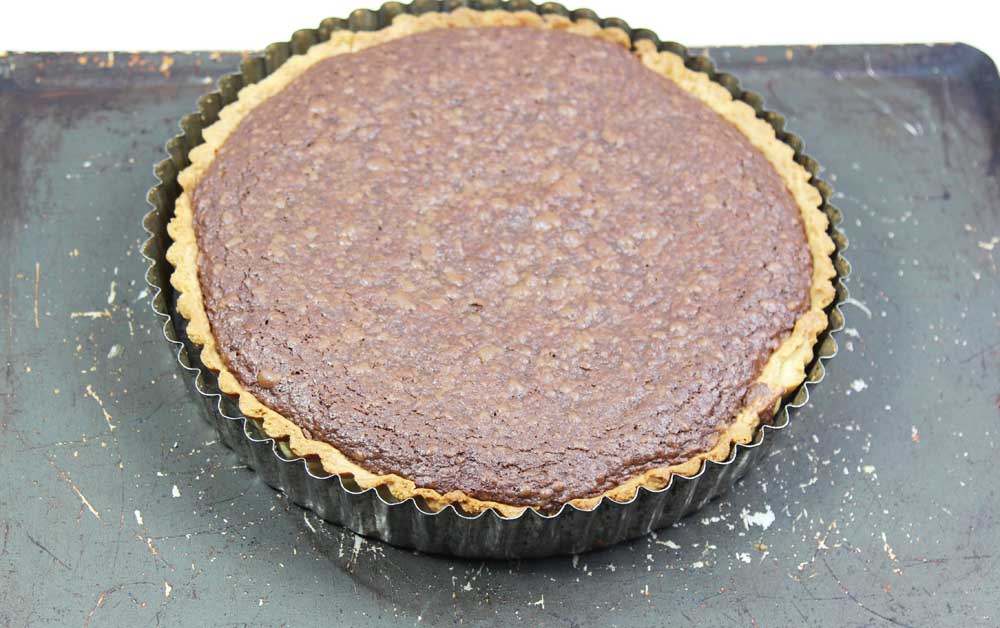
- Always use a pre-baked tart shell ( get the recipe and instructions HERE)
- Turn the oven temperature down after baking the pastry. The mousse needs to cook slowly
- Take it out of the oven when it still has a wobble. It’s a bit like a cheesecake and is best under-cooked rather than overcooked.
- Ganache the top or not. It will still be the best tart you have ever tasted.
Chocolate Mousse Tart
Ingredients
- 300 gm plain flour
- 150 gm butter unsalted
- 50 gm caster sugar
- 1 pinch salt
- 1 Egg
- 100 ml milk or enough to measure up to 100 when mixed with the egg.
Chocolate mousse Filling
- 300 gm chocolate 70%, chopped
- 200 gm butter unsalted chopped
- 2 whole eggs large
- 2 whole yolks keep the whites for something else
- 125 gm caster sugar
Ganache
- 100 ml cream thickened or 35% butter fat
- 50 gm chocolate dark or milk chopped
- 1 Tablespoon glucose syrup optional
Instructions
- You will need a 24 cm / 10 in removable bottom tart case approximately 4 cm / 1.5 inches deep. Set the oven Oven to 180 C/ 350 F for the pastry then turn down to 160 C/ 320 F for the chocolate filling.
- Put the flour, sugar, butter and salt into the bowl of the food processor and blitz till it resembles fine breadcrumbs,
- Mix the egg and milk till it measures up to 100 ml
- Pour it into the food processor and mix till the dough comes together and forms a ball then turn off and empty onto the bench.
- Push the dough together. ( If you feel it is too dry, wet your hands and push together. This should add enough moisture to push it together. This in all likelihood will not happen.)
- Flatten into a disc, wrap in plastic and refrigerate for at least 30 minutes ( or up to 2 days). When ready to roll, take it out of the fridge and let sit for 10 minutes then, sprinkle a bench with a little flour. Start rolling from the middle outwards turning and moving so it doesn't stick. You don't need lots of flour. Run your knife under the pastry and turn. Roll out to the size you need. Then fold in half and lift into your tin. Try to make sure the pastry is not too thick. Thinner pastry is much better.
- Push into the corners of the tin and trim around the edges. Pop this back into the fridge to chill for 30 minutes or up to 2 days covered.
- When ready to bake put onto a tray and fill with paper and baking beans. Bake for 15 minutes or until the pastry is starting to set and cook. The edges will be a little browner than the middle. remove the baking paper and beans ( check for splits and repair if necessary with a spare piece of pastry).
- Return to the oven again for 15 minutes or until the middle of the tart case is cooked and golden.
- Take out and cool then trim the edges. Cut outwards with a sharp paring knife.
- Your pastry is now ready to fill.
Chocolate Mousse Filling
- Put the butter and 300 gm of chocolate into a heat proof bowl and melt over a double boiler or in the microwave in short 30 second bursts stirring frequently. It doesn't need to get too hot
- In another bowl beat the eggs and yolks with the sugar till white and doubled in volume. Fold the just warm chocolate mixture into the egg mixture in two short batches. Fold gently. Pour the mousse into the prepared tart case. There should be plenty of mixture to fill it. It won't rise at all so you can fill it close to the top of the pastry.
- Bake for 20 minutes and then test. Give the tart case a bit of a wobble. It should be just wobbly but not liquid. It can take up to an additional 10 minutes depending on your oven. It will continue to cook a little and firm up a little once taken out.
- Cool on a rack. To make the ganache: Put the cream and glucose into a jug and heat in the microwave till hot but not boiling. Stir well and pour over the chopped chocolate and stir till the chocolate is melted. Sit for a couple of minutes an then spread over the top of the cooled tart.

Its looks very yummy!! Thanks for sharing such a delicious one!!
Oh, my. This is the kind of dessert my family goes crazy for!!! It sounds spectacular!!!!
This looks perfect. Perfect and gorgeous. Pinning to try later next week 🙂
let me know how you go!
Loved all the tips and especially the video to see just how wobbly it was went you took it out of the oven. Definitely on my to do list.
Definitely my kind of tart! Truly full of chocolate and I love that dark smoky kind!
Yum, so decadent!
this is absolutely decadent! your crust is perfect and the filling couldn’t be creamier. what a treat!