Checkerboard cake with lemon buttercream
This colourful fun cake is easier than you may think. Stick with 2, colours or use 4 as I have. It's done all the same just alternate colours and layers together
Ingredients
Cake layer
- 500 gm flour, plain 17.60 oz | 3 1/2 cups
- 1 teaspoon baking powder
- 1/2 teaspoon baking soda
- 1/2 teaspoon salt
- 350 gm caster sugar 12.35 oz | 1 1/2 cups
- 90 gm brown sugar 3.20 oz | 1/2 cup
- 250 gm butter, melted, unsalted 8.8 oz
- 2 large eggs (110gm)
- 500 ml buttermilk 2 cups
- 1 teaspoon vanilla
- 4 gel colours
Lemon Buttercream
- 500 gm unsalted butter, room temperature 17.60 oz
- 1 lemon zest and juice
- 500 gm icing sugar 17.60 oz / approx 4 cups
- 1 teaspoon vanilla
- 1/2 tsp salt
Instructions
Vanilla cake
- You will need 4 cake tins. 16 to 17 cm or 8 to 9 inches. Grease and line the tins.Set the oven to 170C/ 340C
- Put the flour, baking powder and baking soda into a bowl and whisk well to combine
- Mix the two sugars, the vanilla and buttermilk together and whisk well until smooth and combined. Melt the butter and whisk into the buttermilk mixture until combined
- Pour the wet ingredients into the dry ingredients and mix until thick and well combined (Mix by hand or in a mixer with a paddle attachment)
- Divide the mixture into 4 bowls and colour each one (or just use two colours). Fill each cake tin with the batter. Bake approx 20 minutes or until a skewer comes out clean
- Cool the cakes. (cakes cut better once chilled). Cut the top from the cakes and flatten them to even.
Lemon Buttercream
- Buttercream is more successfully made in a mixer. Beating butter until light and creamy makes the best frosting. Use the paddle attachment or beaters if using a hand held mixer.
- Cut the butter into cubes and let it come to room temperature.
- Zest the lemon and add the zest, the vanilla and salt to the butter in a mixer bowl. beat till light and fluffy. The butter will be nice and white. This should take about 5 to 8 minutes at least. Add the icing sugar 1/2 a cup at once and beat in well.
- Whipping up buttercream requires adding the sugar a bit at a time. This allows it to be incorporated into the butter without knocking the air out, that you just put into it. It allows the sugar to melt into the butter slowly AND most importantly the sugar won't fly out everywhere when you turn the mixer on.
- Squeeze the lemon. Once the sugar is added finish the mixture off with as much lemon juice as your tastebuds want. You should think about adding just enough to make the buttercream light and spreadable (usually about 20 to 30 ml- 1 to 11/2 tablespoons)
For coloured buttercream
- Use 1/2 or up to 3/4 the buttercream aside. Once you have filled and covered the cake you can colour what is left separating as described belowDivide the buttercream into 4 separate bowls and colour them to match the cake layers. To pipe multicoloured buttercream, spoon the buttercream onto a piece of cling wrap. Wrap this up into a sausage and cut the end close then put into a piping bag with a star tube. The buttercream will squash out the bottom in a nice multicoloured stream.
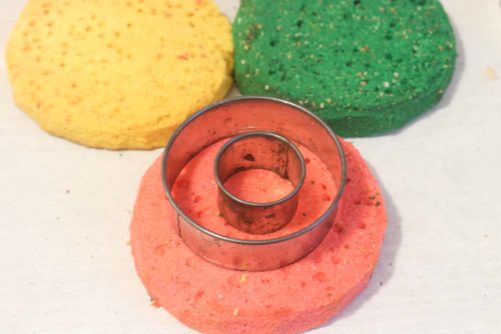
Cutting the cake and making the patterns
- I have a set of cutters, but you don't need cutters to do this. What you do need is to find a way to cut 3 equal circles from each cake. You can make 3 different sized circles from cardboard and use them as a pattern to follow to make even circles on each cake.
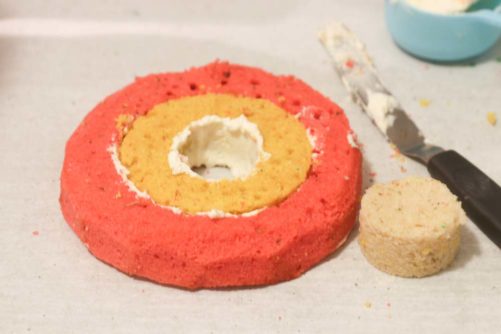
- Once you have your 3 circles in each cake you are ready to line each cake with a little buttercream between each of the circles and put them together
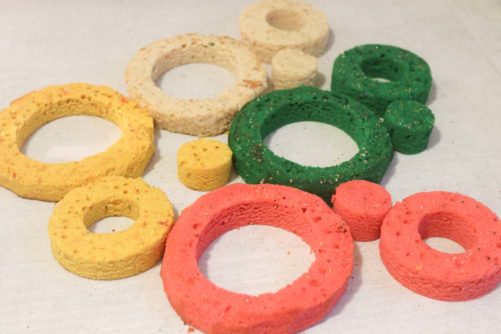
- The buttercream will form part of the cake pattern and make each piece of cake deliciously creamy. Each cake needs alternate cake colours that you will make by alternating the colours in each cake. You will need to alternate the colours before stacking and buttercream -ing together.
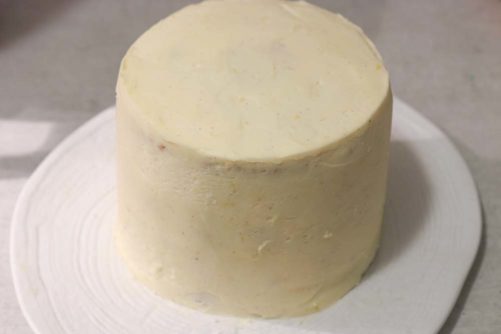
- Each layer needs a thin lining of buttercream. Stack on the next cake and continue until all 4 layers are sacked. Put the cake onto a serving plate or cake base. Cover the cake with a very thin layer of buttercream and chill for at least 30 minutes. This sets the crumbs onto the cake and makes the final layer much better.
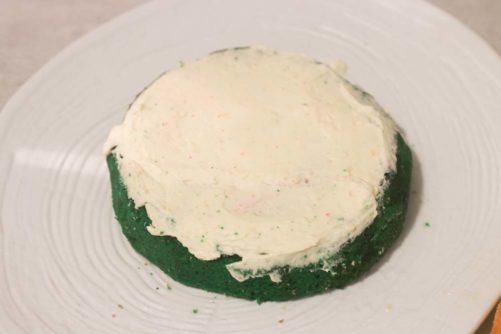
- Put a large amount onto the top of the cake and start to smooth it over letting the excess go to the edges of the cake. Smooth the sides bringing the buttercream down the side of the cake with a flat cake palette knife. Add more buttercream as necessary (making sure to leave some behind to colour for the top)
- Use the leftover buttercream and divide into 4 as described above. use the same colours as you used for the cake layers.Use whatever sprinkles or decorations you like to finish the cake.

Notes
The sugar amount in buttercream is up to you. You can add more or a bit less according to your taste. If you like it a little sweeter you can add more sugar.
Icing sugar types: Pure icing sugar or icing sugar mixture are different. Pure icing sugar is just that, pure and not mixed with anything. Icing sugar mixture has cornflour in it. This stops the sugar from forming lumps. Cornflour can also give glazes a better texture when pouring. When sprinkling over cakes and pastries it also lasts a little longer before melting than pure icing sugar
There is a lot of buttermilk in this recipe> Do I need it? YES you do. Buttermilk is acidic and it will react to your raising agents creating a great texture for your cake. What if I can't get Buttermilk? That's easy, you can make it.
To one cup of milk (250ml | 8.45 fl oz) add 2 tablespoons (or 40 ml) of white vinegar or lemon juice. Stir and set aside
Gel colours. These are not liquid and they don't change the texture as a liquid colour would.