
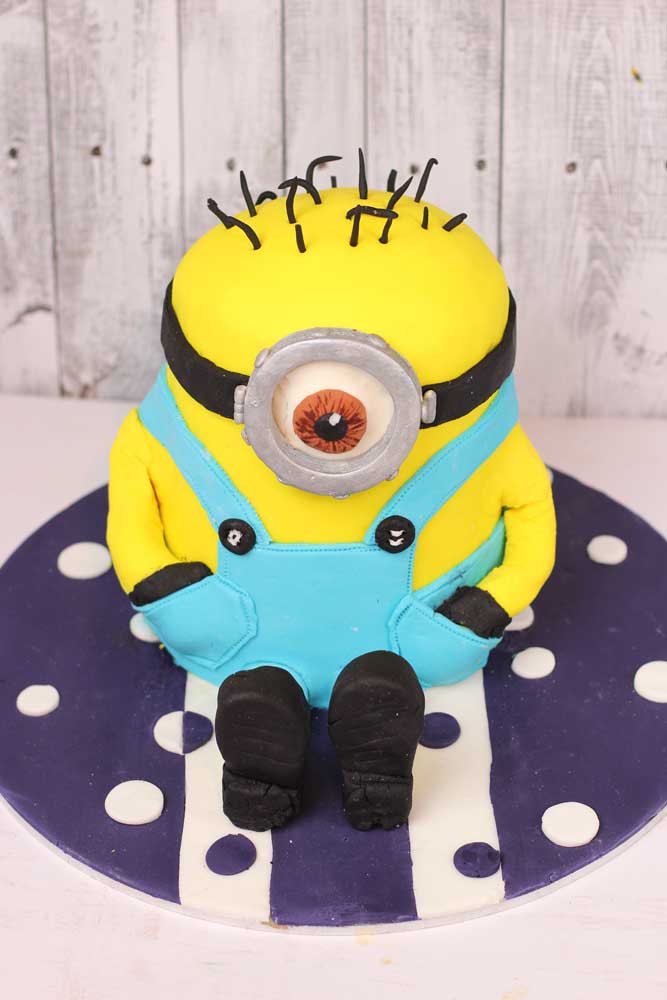
How to Make a Minion Cake!
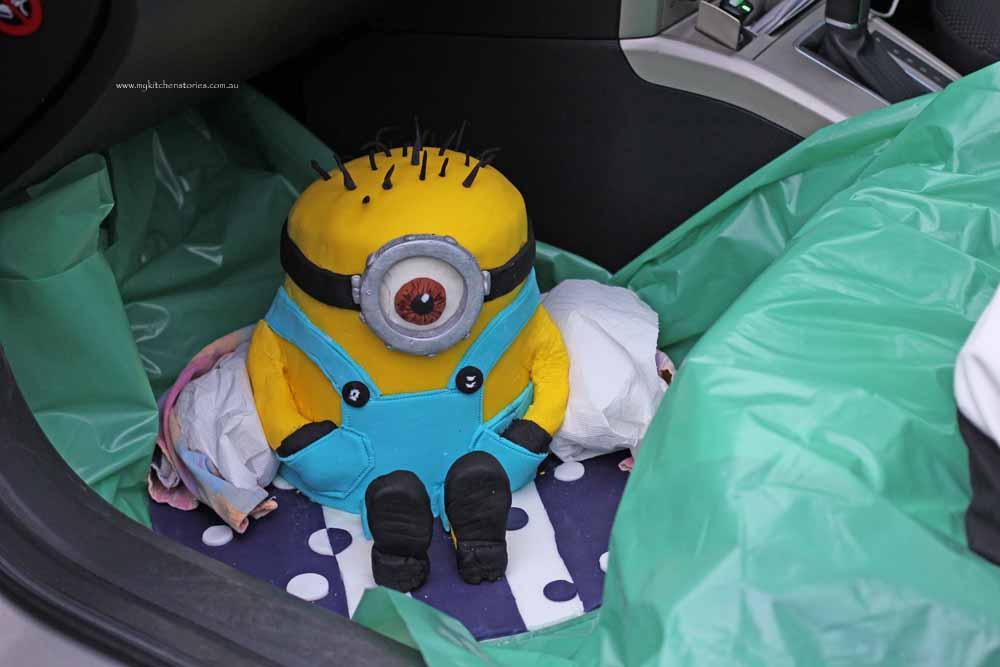
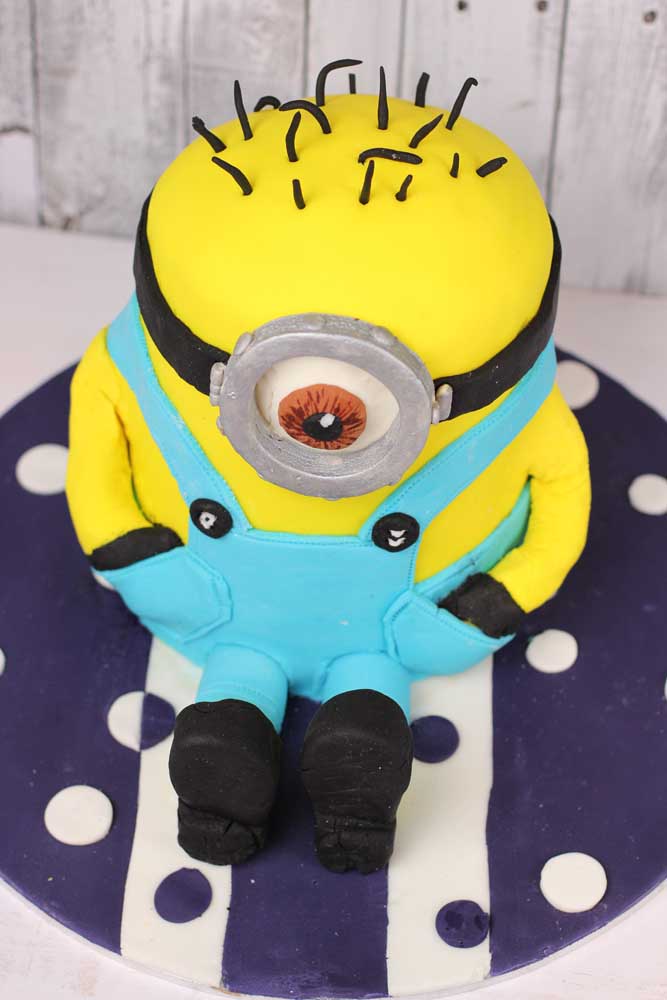
It was a little while ago now that I made this Minion cake. I got most of the help I needed from how to cook that.net. I watched a video Ann Reardon did and then worked on from memory. I wanted to make mine simpler by having it sit on the board, Ann’s version is an ambitious three D standing Minion. This one although similar, is simpler and easier to put in the car and move to the birthday party!
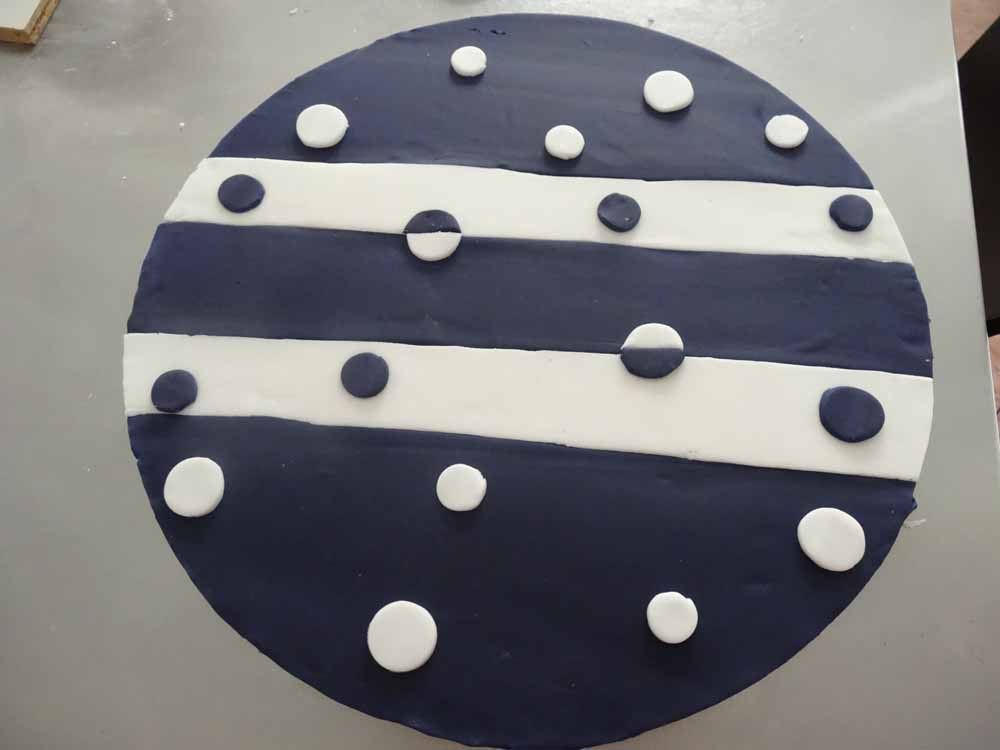
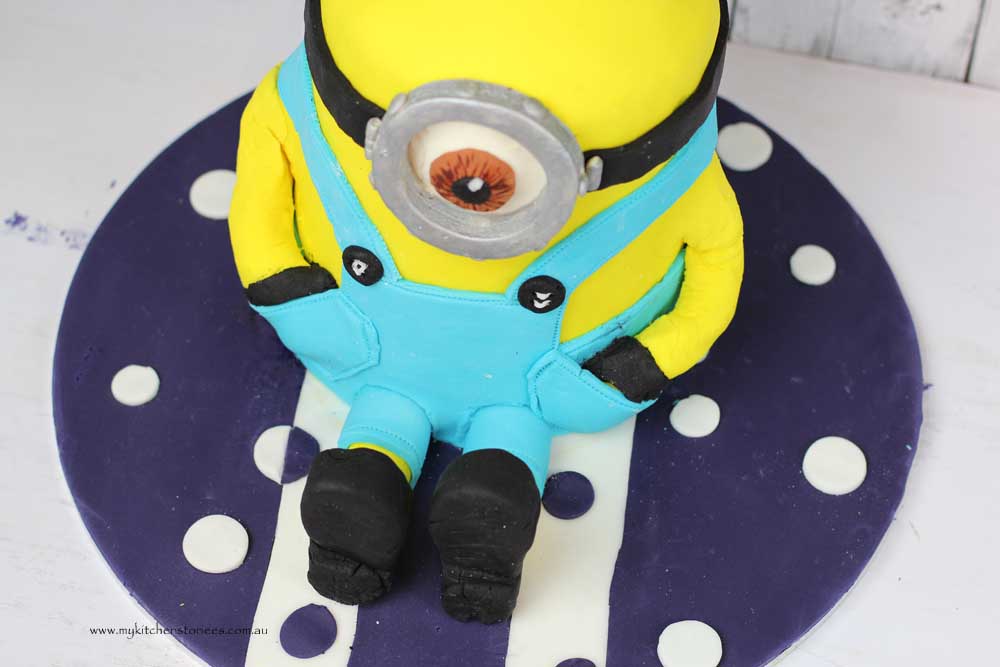
In my eyes he looks a little rough but I think as a whole he passed the test. The arms are one of the hardest parts and the arms on my cake were a little funny looking, but I don’t think the birthday girl noticed. The cake takes about 5 kg of roll out icing to make. I usually just buy a large 5 kg bucket so I don’t have to worry about running out. I like to put my cakes on to a decorated base. It just makes them look that much more special. This one had a nice purple white spotted base made before I started decorating the cake.
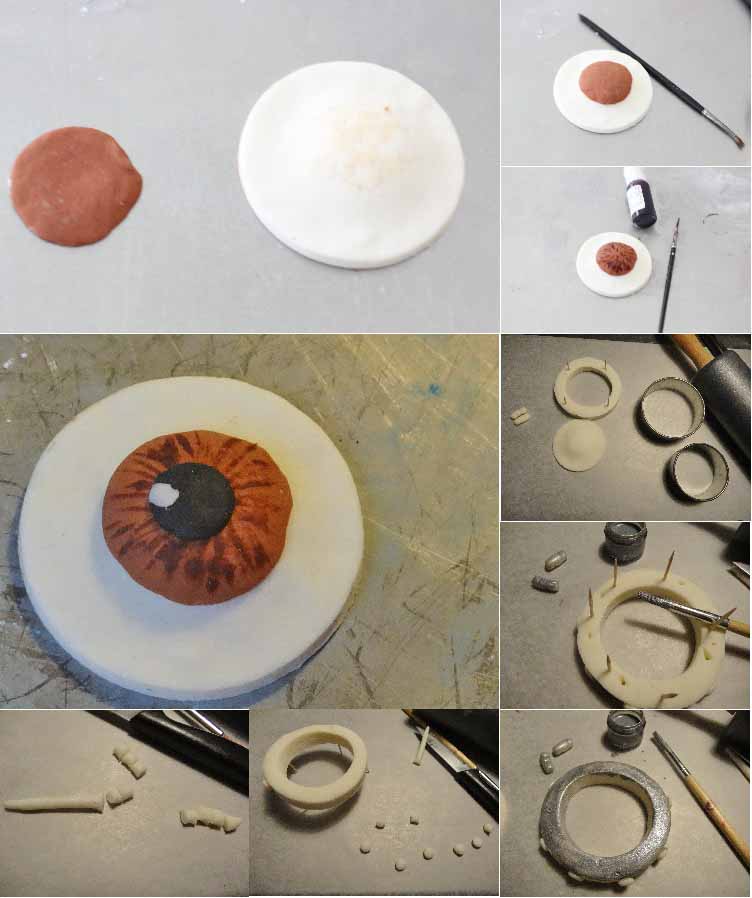
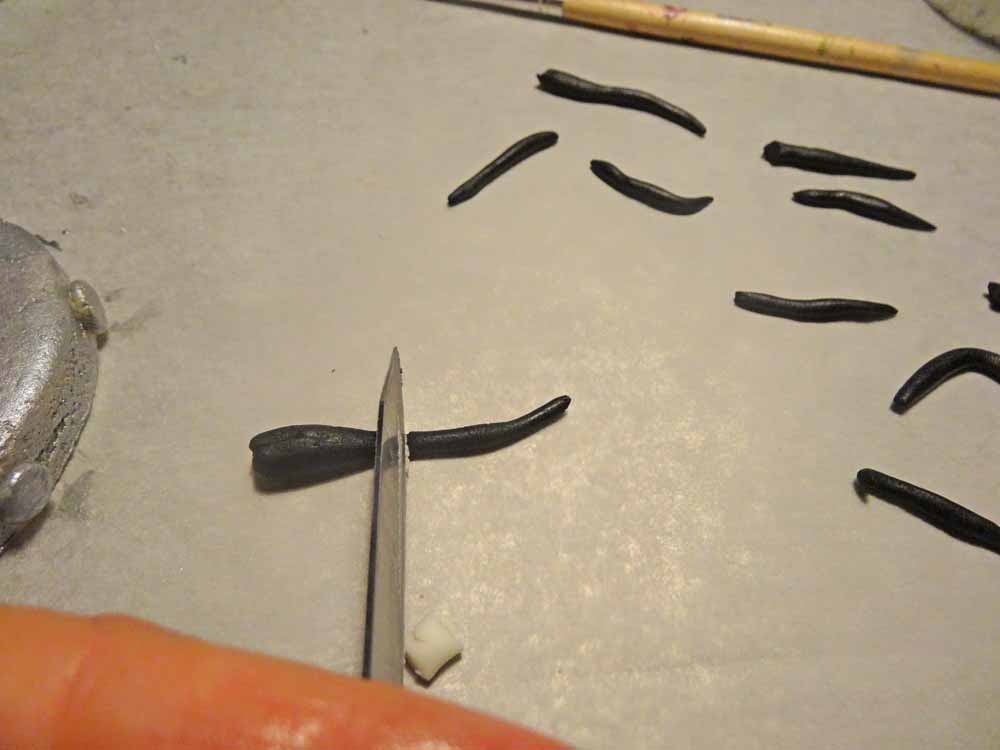
The cake itself is one that I use a lot. It a great one to sculpt but also tastes very chocolatey and never dry. I made some of the details like the shoes, the eyes and the goggle a week ahead so I didn’t have so much to do on the day I pieced the cake together. I made the cake pieces a couple of days and up to a week ahead before I started decorating. It’s always best not t leave cake decorating to the last minute. Do as much as you can ahead of the day. The cake was completely finished the day before I needed it and is usual I keep it in a cool room with a fan on it to dry out the icing a bit before I deliver. Never put your finished cake in the fridge one covered in sugar icing as the icing will sweat and melt. I never put a lot of powdered sugar in the buttercream preferring a solid butterfat base, while it sits out of the fridge.

Recipe for How to make a Minion Cake
How to make a Minion Cake
Ingredients
- 550 gm caster sugar
- 350 gm plain flour
- 90 gm dark cocoa powder 3/4 cup
- 2 teaspoon baking powder
- 1 teaspoon baking soda
- 3 eggs
- 200 ml milk 3/4 cup
- 200 ml coffee 3/4 cup
- 200 ml buttermilk 3/4 cup
- 125 gm butter melted
Chocolate buttercream
- 750 gm unsalted butter softened
- 420 gm pure icing sugar sifted (3 heaped cups)
- 2 teaspoon vanilla
- 300 gm melted milk chocolate or dark if you like
- 10 ml lemon Juice 2 teaspoons
- 2 kg yellow roll out icing
- 500 gm black icing
- 1 kg blue icing
- 2 kg white icing
- 1 whole egg white
- 150 gm icing sugar
Instructions
- You will need thick cake skewers to hold parts of the cake together. the extra Pure Icing sugar for rolling and making glue. Prepare cake tins (20 cm). You will need to make 4 layers. You will need to make the cake twice and cut the cake into 4 . Preheat the oven to 170 C
- Melt the butter and cool slightly
- Place the flour, sugar, cocoa, baking powder and soda into the bowl of a mixer and mix to combine.
- Mix the eggs, milk, coffee, buttermilk and vanilla in a bowl and whisk together. With the machine turned off add the liquid into the dry ingredients and mix on low just a couple of turns to just start to combine. Add the butter then when the ingredients are incorporated beat on high till well mixed.
- I weigh my cake layers so they are even. With this one though, you should get two cakes from each mix.
- If you only have 1 tin. Cut your mix in half evenly. Bake till a skewer inserted comes out most clean. The cake will take approximately 40- 50 minutes. When the cake comes out of the oven cool for 15 minutes before running a knife around the edge and removing the tin. Clean and re-grease and line the tin and continue.
- The cake must be cooled and chilled before decorating. Preferably make them the day before.
Chocolate Buttercream
- Melt the chocolate and set aside
- Beat the butter till light and fluffy and white. Gradually add the sugar and vanilla and beat again till incorporated. Add the cooled chocolate and beat again on high speed.
- Use the butter cream to sandwich the cakes together and to spread onto the body of the Minion, using a pallet knife as smoothly as possible. Then chill before applying the roll out sugar icing.
Decorating
- When you have 4 cakes, even them off by cutting off the domed top of 1 but keeping the other (making it into more of a head shape by shaving off some of the sides once they are stacked together and filled with buttercream) The cakes can be cut in half and filled with chocolate buttercream when they are cool.
- Stack the cakes and push through the 3 skewers to hold the cake together. Slice the top with a serrated knife to make more of a head shape. Cover the cake with chocolate ganache then set on top of the board you are going to use. This serves as a crumb coat and a base for the rolled icing to stick to. Use a splodge of buttercream on the board to stick the cake and keep it from moving about. I like to chill the cake here for a little to set the ganache.
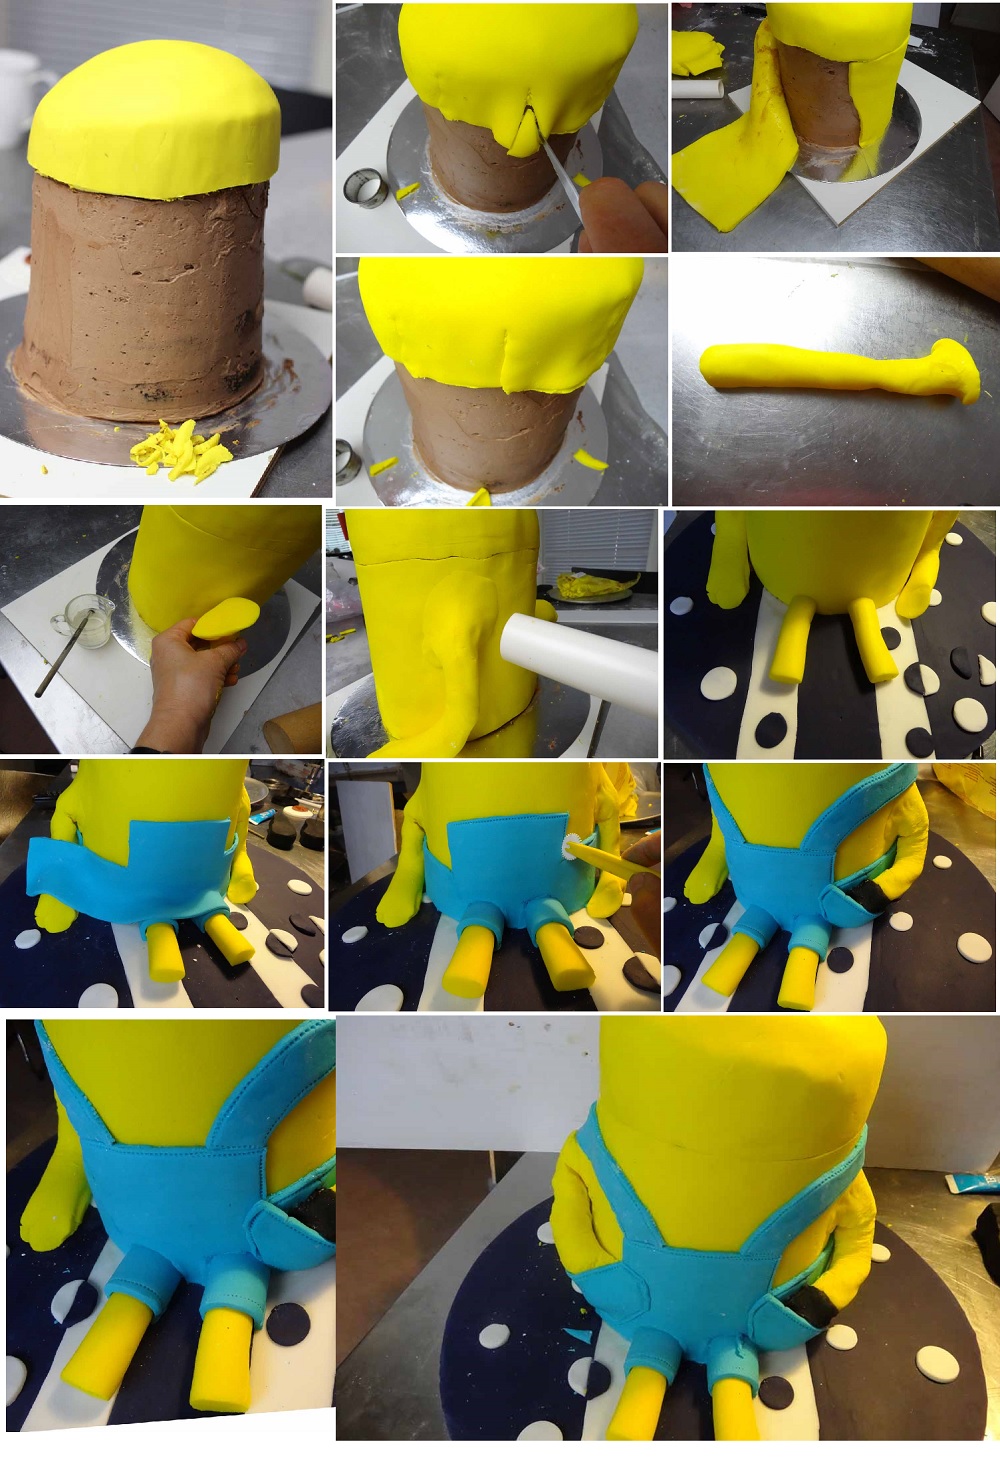
- Start to cover your Minion with yellow roll out icing. Sprinkle the bench with icing sugar so your roll out fondant doesn't stick. Follow the pictures to finish your Minion.
- Make glue to stick together decorations by mixing half the egg white with enough sifted icing sugar to make a spreadable paste This glue will stick all the pieces together.
- If you would prefer not to free hand your cake go to www.howtocookthat.net and learn how to make a template and watch a video on how to attach the pieces.
After watching the movie and getting obsessed with minions, now I really want to make this cake!!
Wow, I bet this cake made someone happy! Very impressive.
Hi Tania,
I am speechless!!! That is some great crafty stuff. You really did an awesome job with each detail. Love it!
Oh my god, you are ao talented and meticulous! ???? this is awesome. I have a friend who is crazy after minions. I’ll make sure she sees this!
Wow, just wow!
I can’t believe how well you painted the eye, that’s just amazing!
Thank you for linking up to this weeks FFF Party. xx
Oh my gosh this is so clever!! Looks fantastic!
Your minion is so gorgeous. You are such a talent, Tania. I do hope the birthday girl loved her cake. I also like to cover the board. This must have been so much work but you sure did deliver the brief! And as for transporting the cake – sometimes I ask them to come and pick up from me as the stress of getting a cake across Sydney is enormous xx
Epic effort! I bet the birthday girl was beside herself with glee!
That’s a masterpiece, Tania. I wish I had skill and patience to make a cake like this.
After all that hard work, it would be hard for me to cut that cake. It looks great!
Wow, so clever and so fun! xxx